

Have you ever renovated an old home before? Or have you ever converted a front porch into a mudroom?
Three years ago, we decided to move from DC to Boston to be closer to family. We had the opportunity to renovate an old home, so we took the original floor plan, printed it out, whited out the walls, and designed a new layout from scratch. One of the first things we knew we needed was a mudroom. We had been spoiled in Chicago and DC with both a garage and mudroom in both homes, but this house had neither! Instead, it had a giant front porch. We aren’t front porch people though, so we promptly decided to convert it into a functional mudroom with a bench and plenty of storage.
Buckle up as I take you through the entire process, from demo and reconstruction to inspiration and design, from bringing that design to life, not leaving out the flooring, hardware, and lighting details, and ending with the final build which has been so functional and crucial to our everyday life!
Disclaimer: This post contains affiliate links. If you purchase something from a link I provided, I may receive a small commission at no extra cost to you. Thank you for supporting my creative endeavors!
Demo + Reconstruction
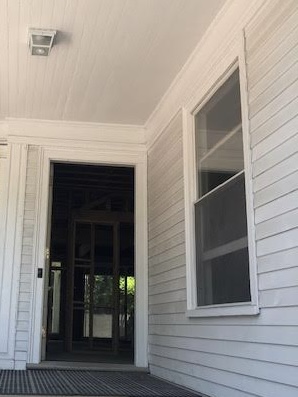
(Before Demo)
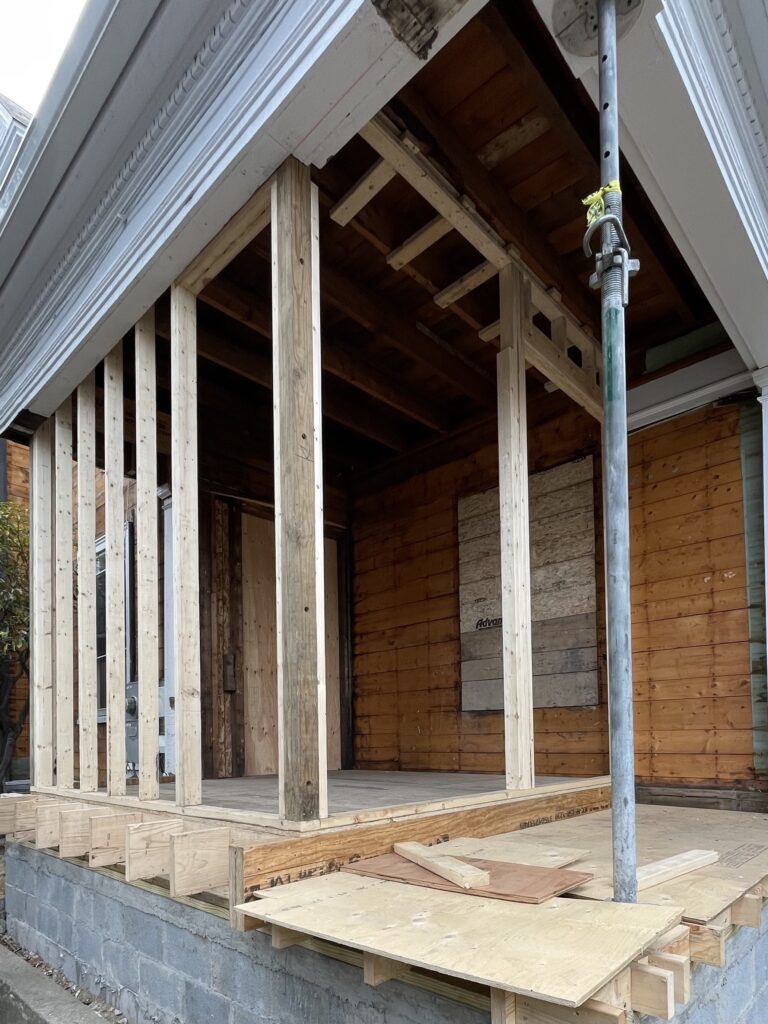
Just about everything in the front porch area would need to be removed and rebuilt for our mudroom conversion. The first part of demo (pictured below) included:
- Removing the bead board and crown from the ceiling
- Removing the railing on the side of the porch
- Removing the pillars supporting the porch
- Removing the decking

Then, the siding, window frame, and door frame were removed. The window was also boarded up since that wall was going to become an interior wall. Following that, new supports were installed:
- New floor joists
- New subfloor
- New wall studs
- New framing for a relocated front door
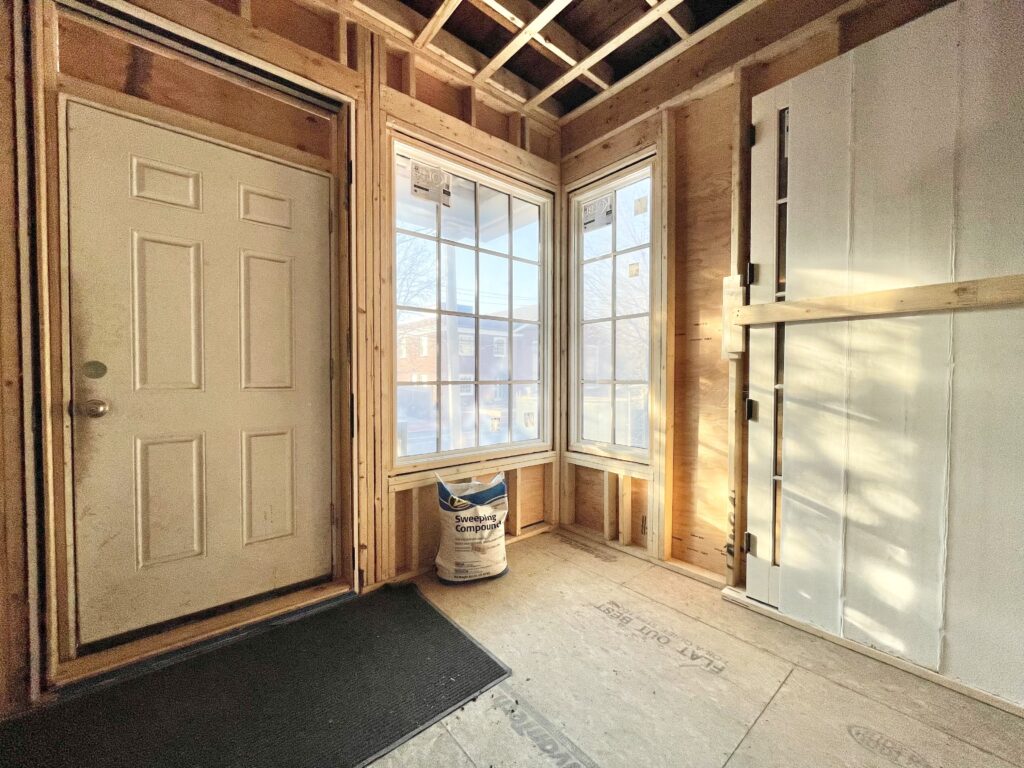
Once all the new framing was complete, new walls and windows went up, and a temporary door was put in place. (Below is the view standing from where the original front door was, looking out toward the new front door.)
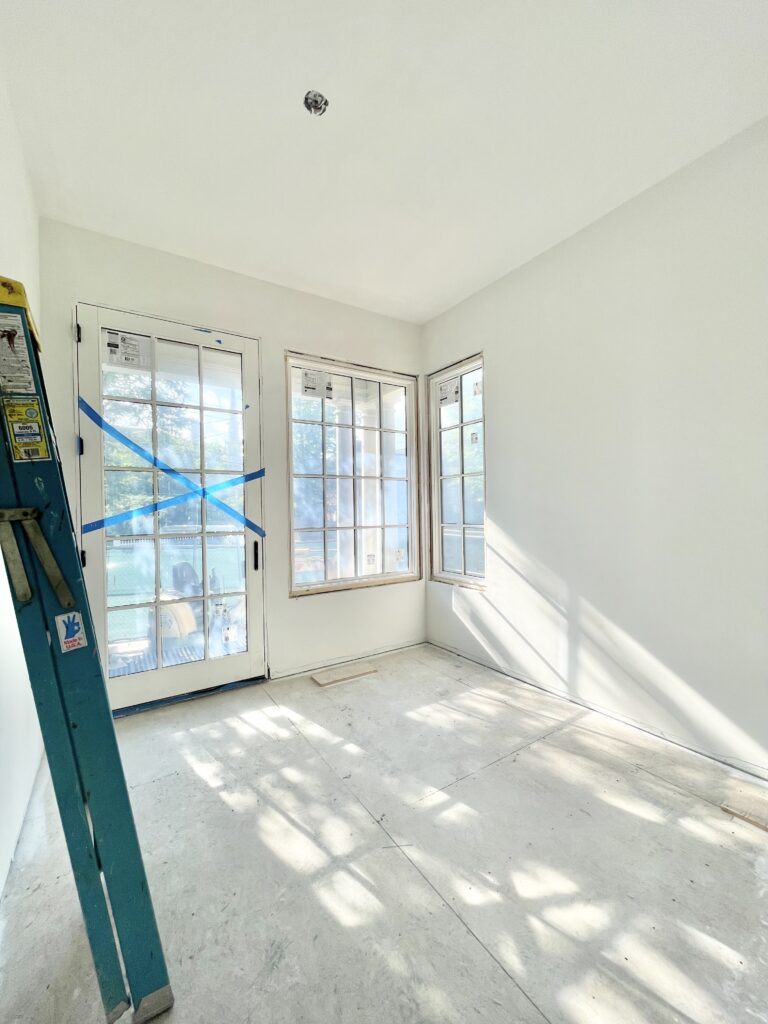
Drywall and paint were next, which really made the space come alive. The new door was also installed and brought in so much natural light along with the new windows!
Inspiration and Design
As all of the demo and construction were being completed, a ton of design decisions were going on behind the scenes. The original design of our mudroom looked like this (below). We literally took a red pen to the floor plan and sketched what we were initially envisioning.
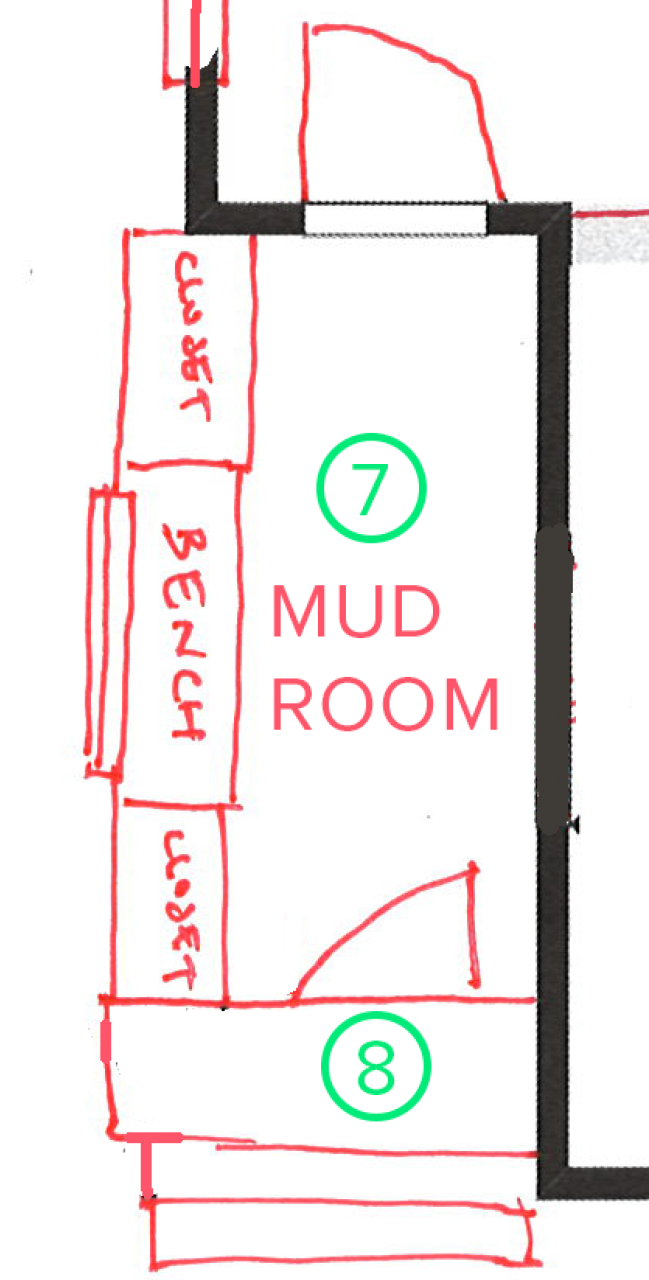
It’s been 3 years since the beginning of the design process so I vaguely remember this, but apparently I had initially planned on building the mudroom cabinetry myself as indicated on the left side of the drawing below LOL! (I’m pretty sure that aspiration happened before the water pipe fiasco at our DC house. 🤪 IYKYK!)
Our first design plans included a bench and window in the middle of the mudroom. The bench would then be flanked with tall closets on either side:
These were our original inspiration photos for the mudroom cabinetry and new front door:
Source: Dewayne Interior Design
Source: Remedy Design
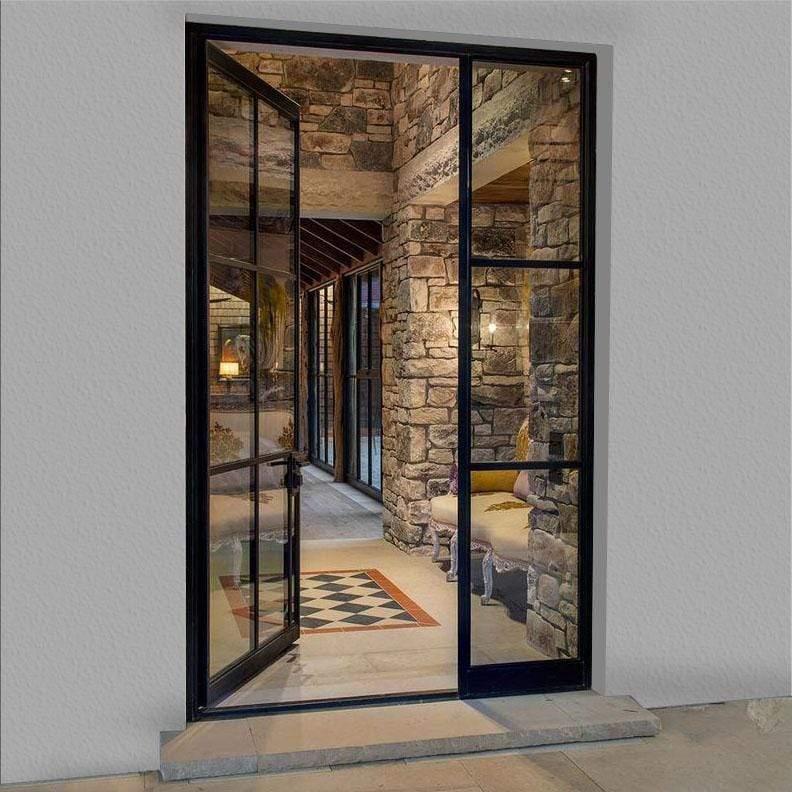
Source: Iron Wrought Doors
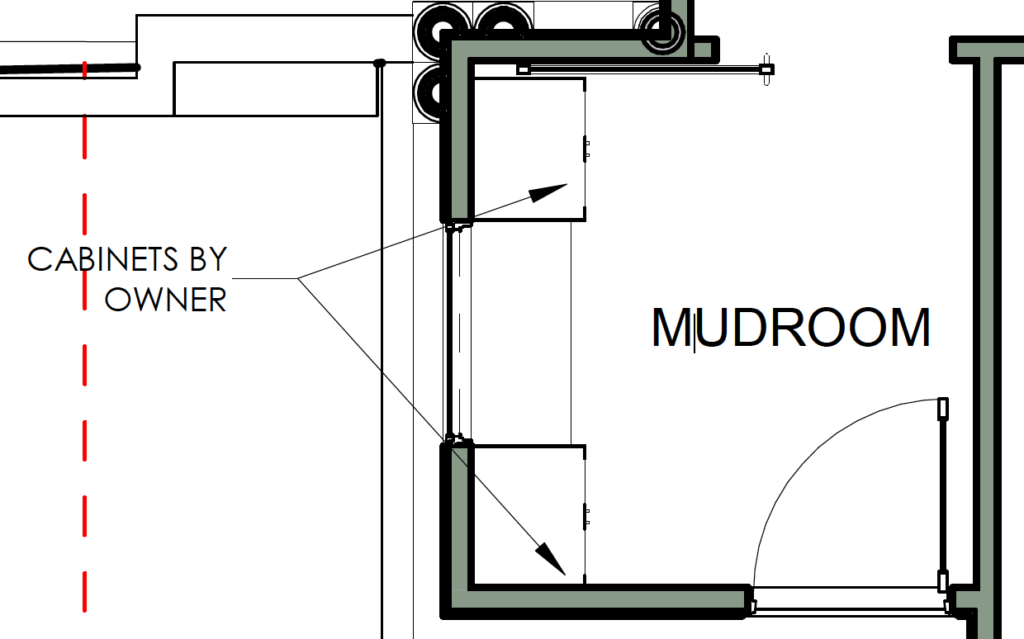
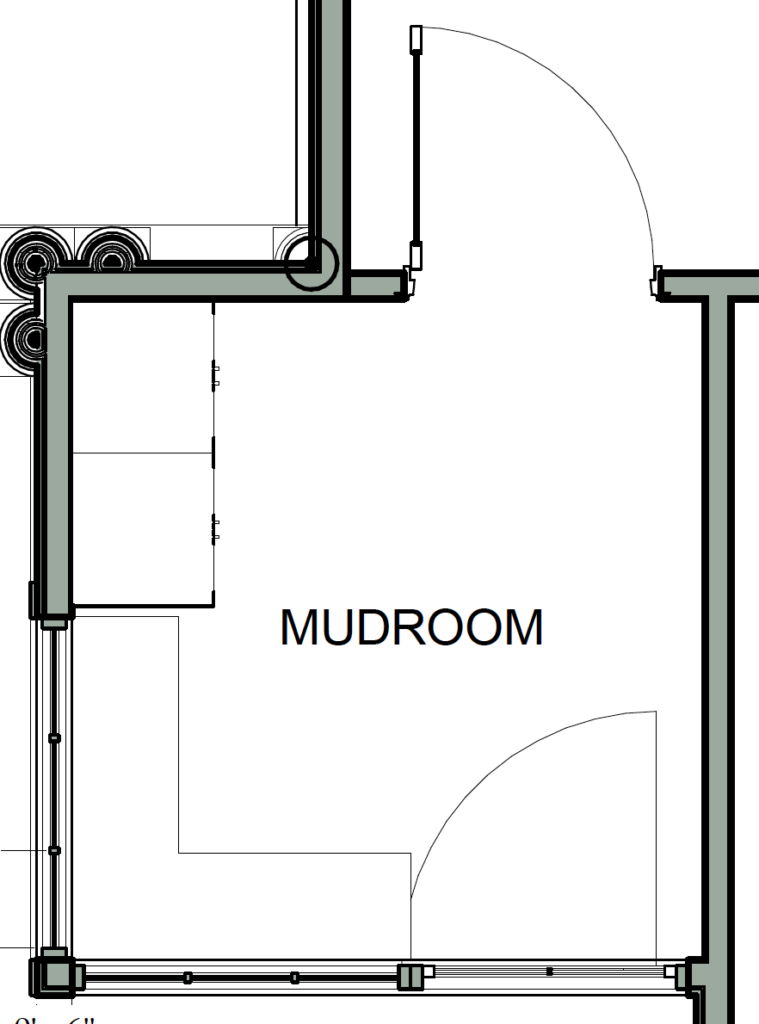
Then we decided to change the layout, seeking a feeling of openness and better flow. We did this by designing an L-shaped bench near the entry, instead of a bench in the middle sandwiched between tall closets:
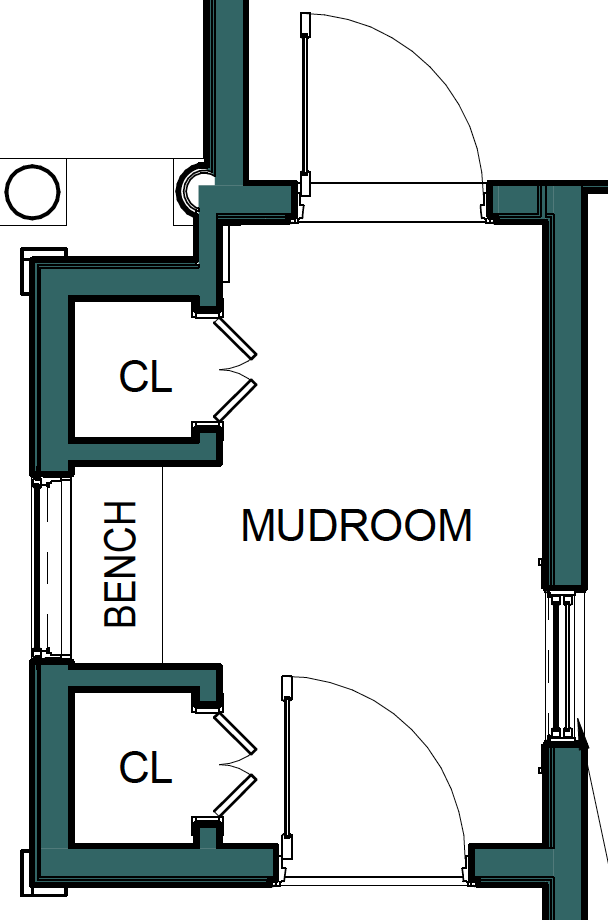
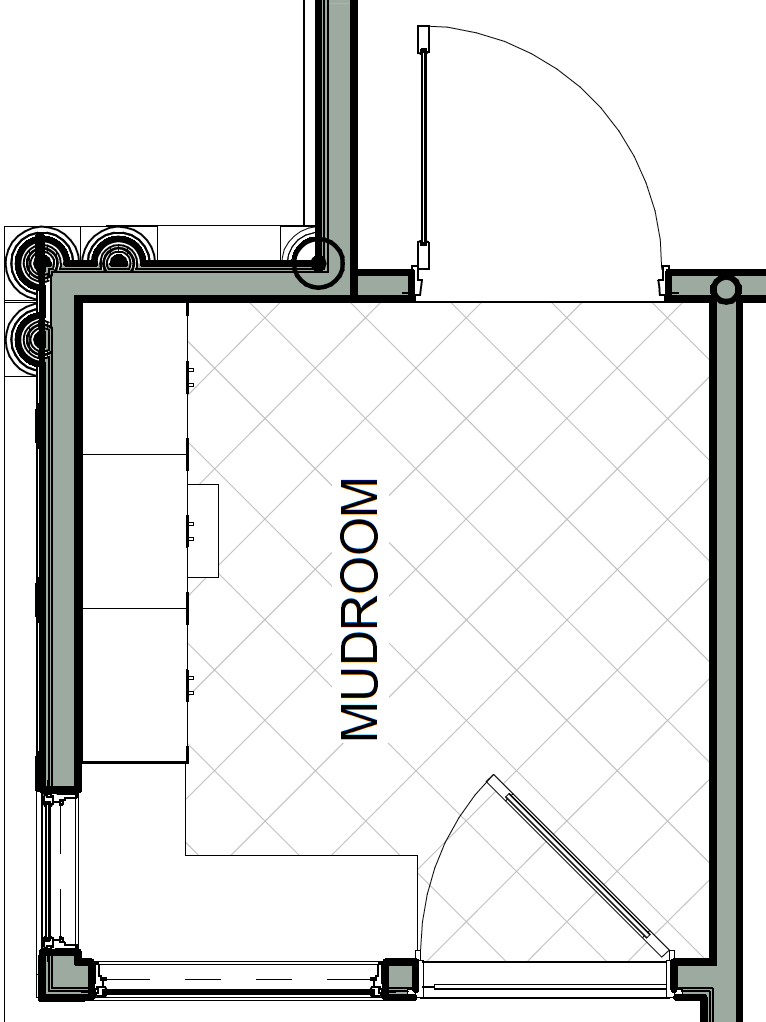
Once we saw the drawing above, we determined we actually needed less bench space but more closet space, so we extended the width of the closet and shortened the bench on one side:
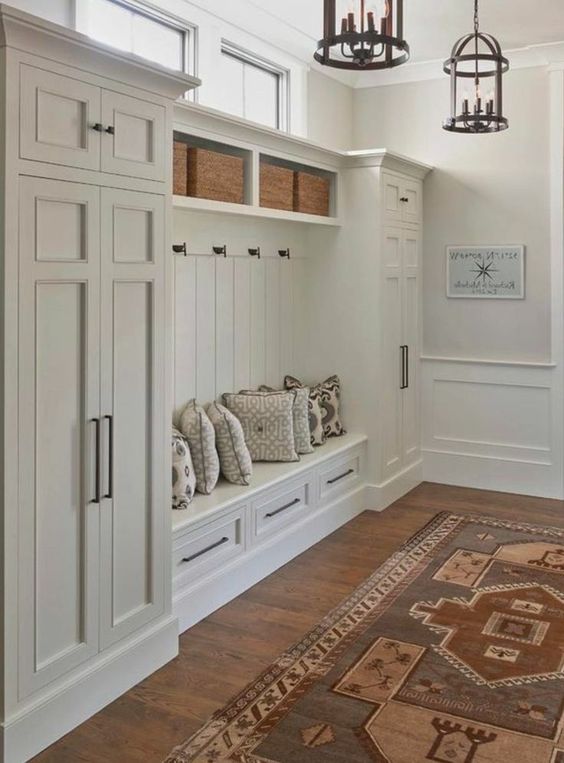
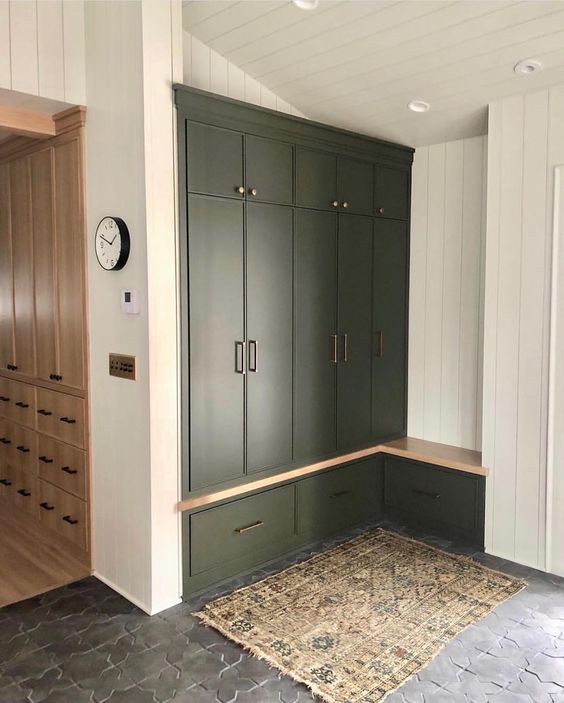
Our final layout was inspired by the three photos below. In the green mudroom, I loved the way the wood from the bench extended across the base of the cabinet doors. I also loved that there were drawers beneath for ample storage:
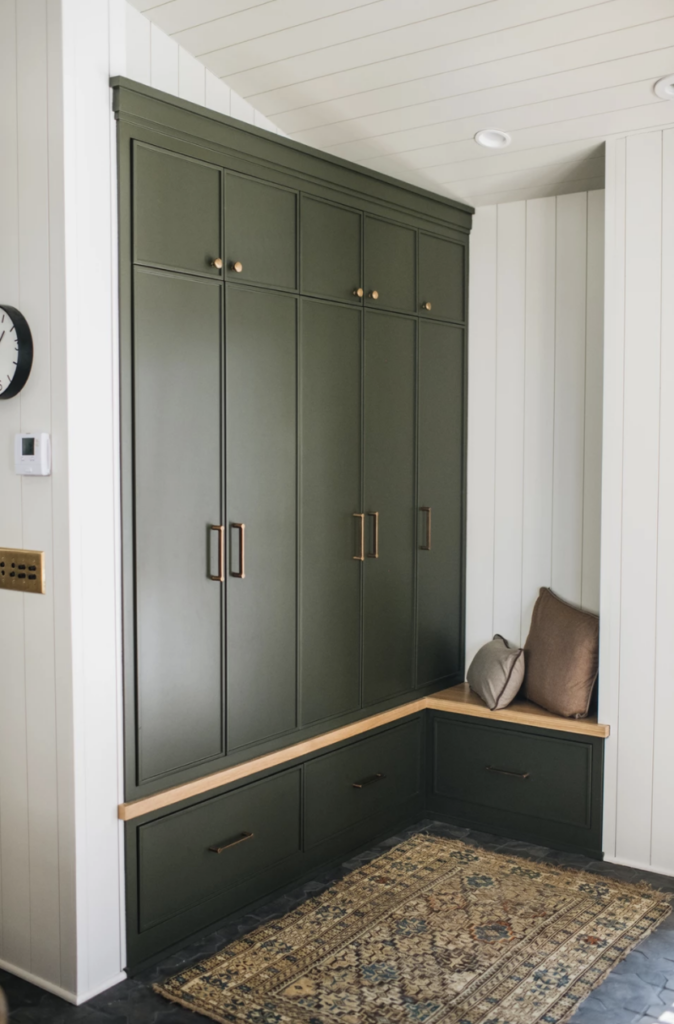
Source: Yond Interiors
In the white mudroom, I loved the mesh drawers for ventilation, especially since our plan was to use the drawers for shoes:
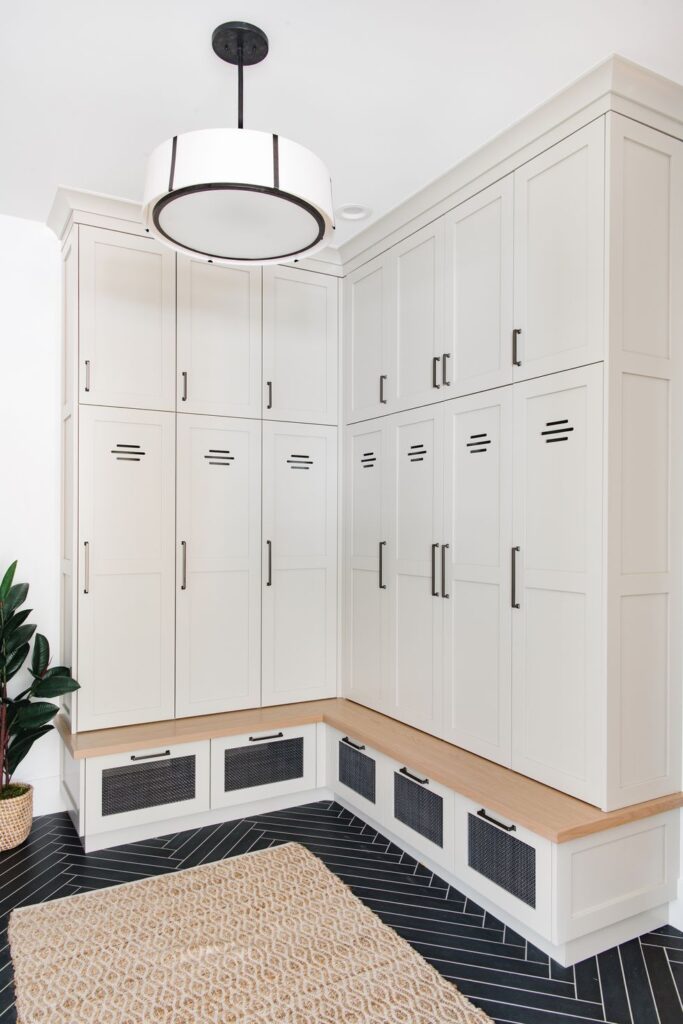
Source: Allison Campbell Design
In the blue mudroom, I loved the routed out vent details in the cabinet doors to allow for airflow. I also loved the brass pulls on the dark cabinetry. I remember struggling with deciding whether I wanted a dark moody mudroom or a light and bright one.
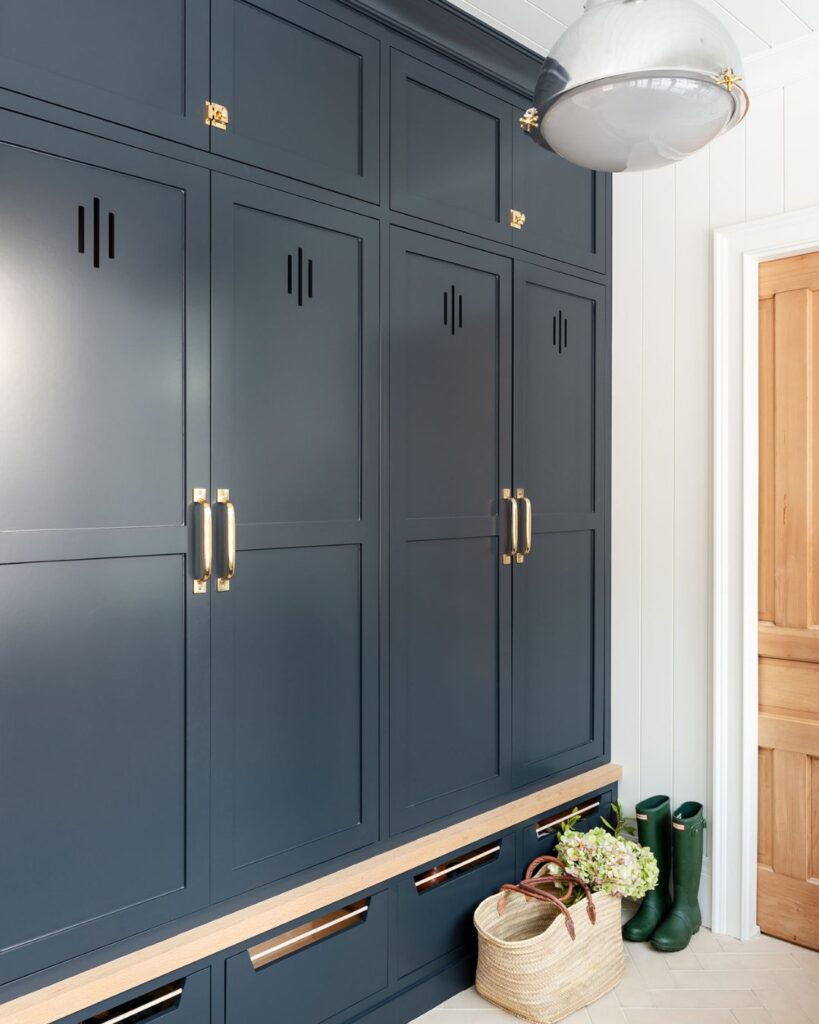
Source: Studio McGee
After seeing these three photos, I knew that what I was envisioning would include a blend of elements from each of those mudrooms. One of the biggest challenges during the design phase, however, was that I always knew the specific things I liked when I looked at photos, but had a hard time visualizing it all together in our specific space. I was also doing all of the designing remotely from DC, which proved to be quite difficult. Ultimately I realized that I really needed someone to create renderings for me to see all the different elements I loved, brought together in one drawing.
Bringing Design to Life
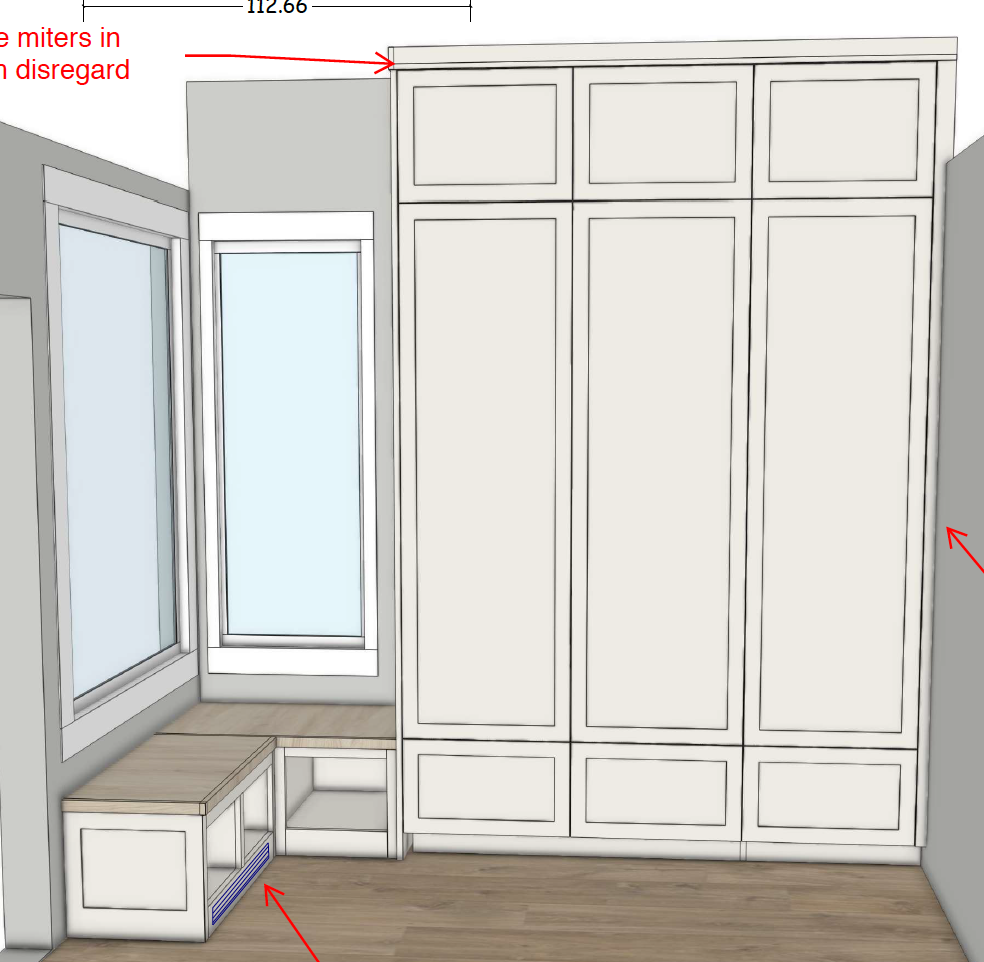
Once we designed the main components of our mudroom, we finally received one of the first iterations of renderings of our specific space:
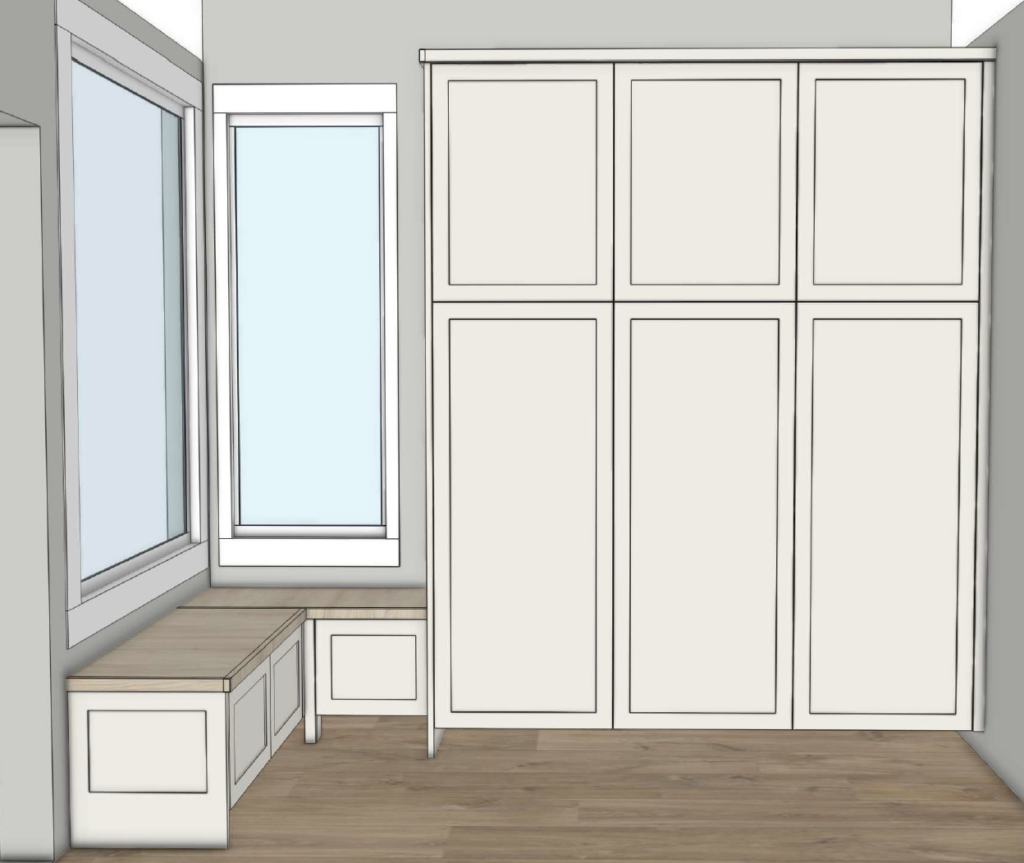
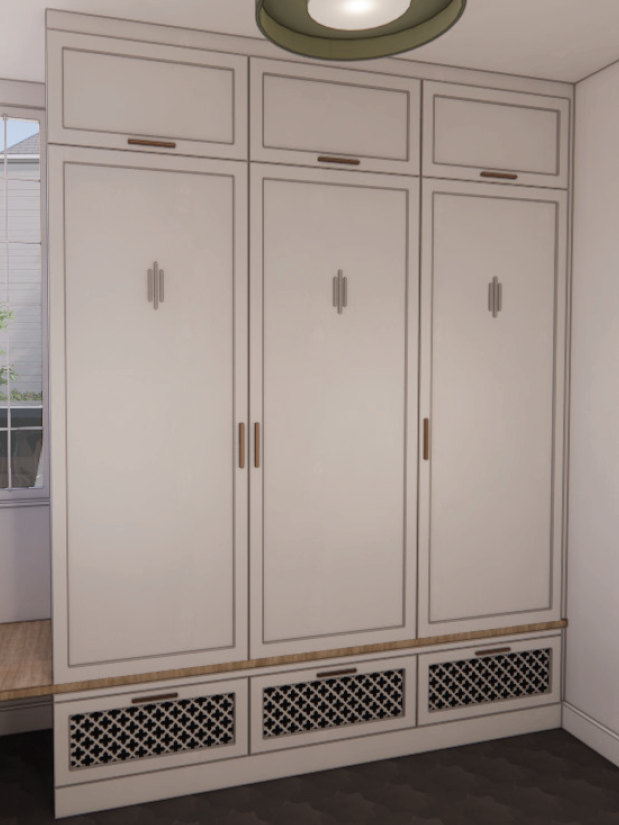
After some discussion, it was revised to better reflect my inspiration photos, with extra cabinetry brought all the way up to the ceiling and drawers underneath for shoes:
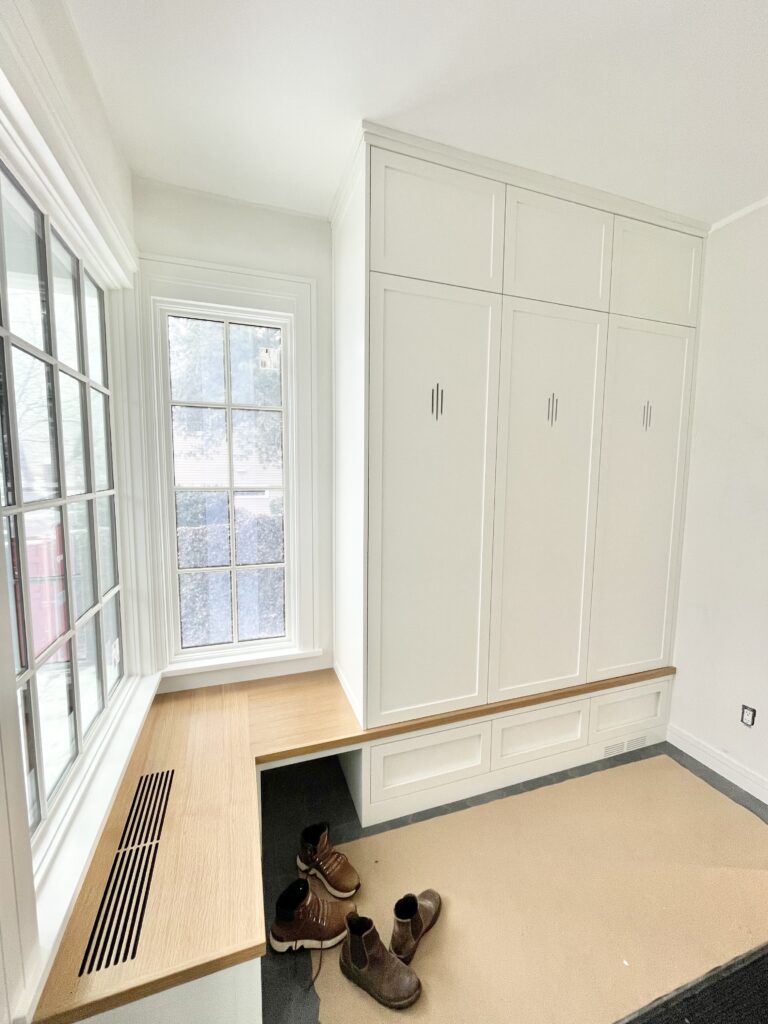
The next step was to decide how we wanted the area under the bench to look and function, based on the following three options:
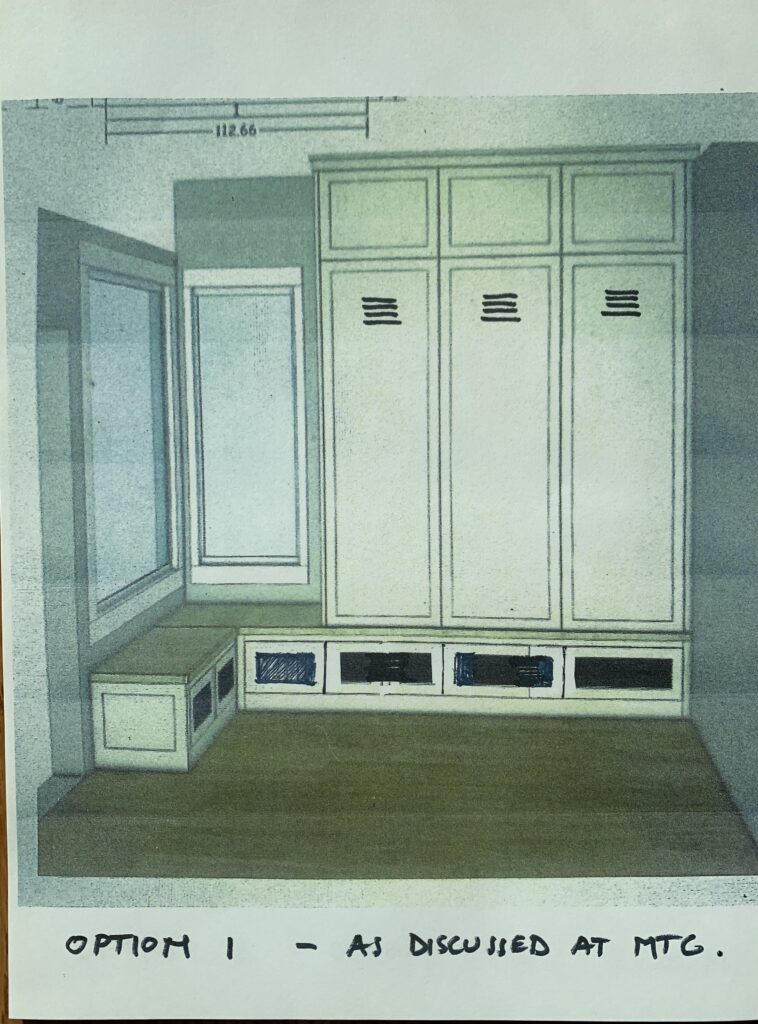
1) small mesh drawers
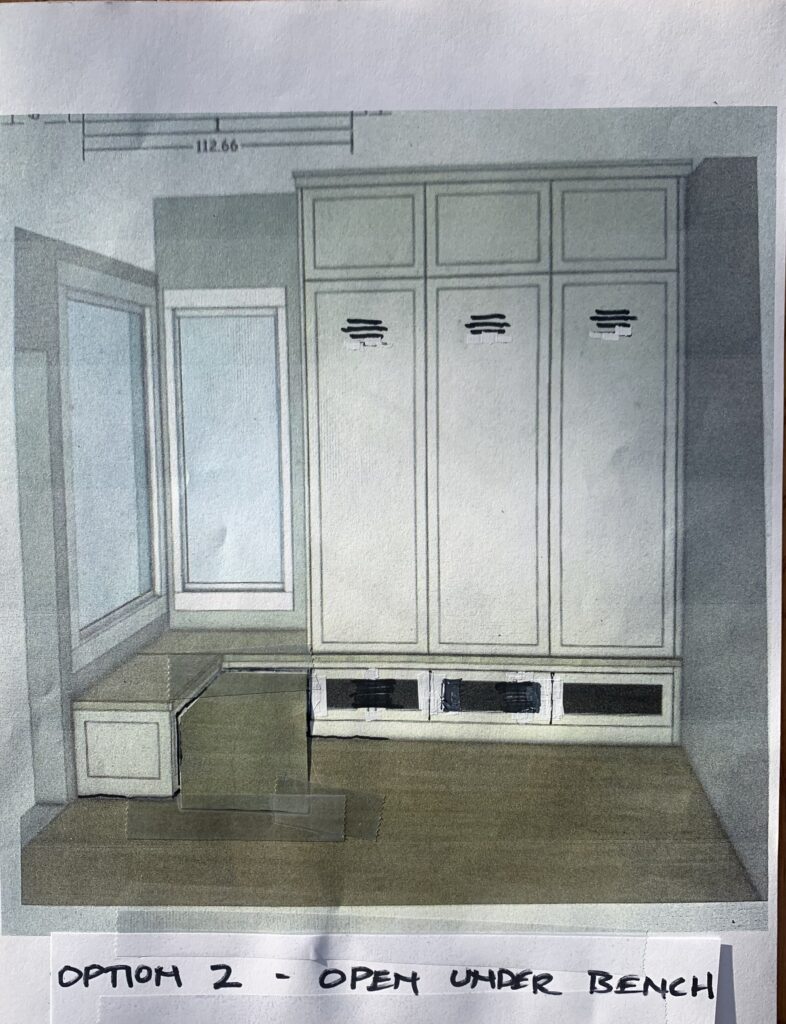
2) open space
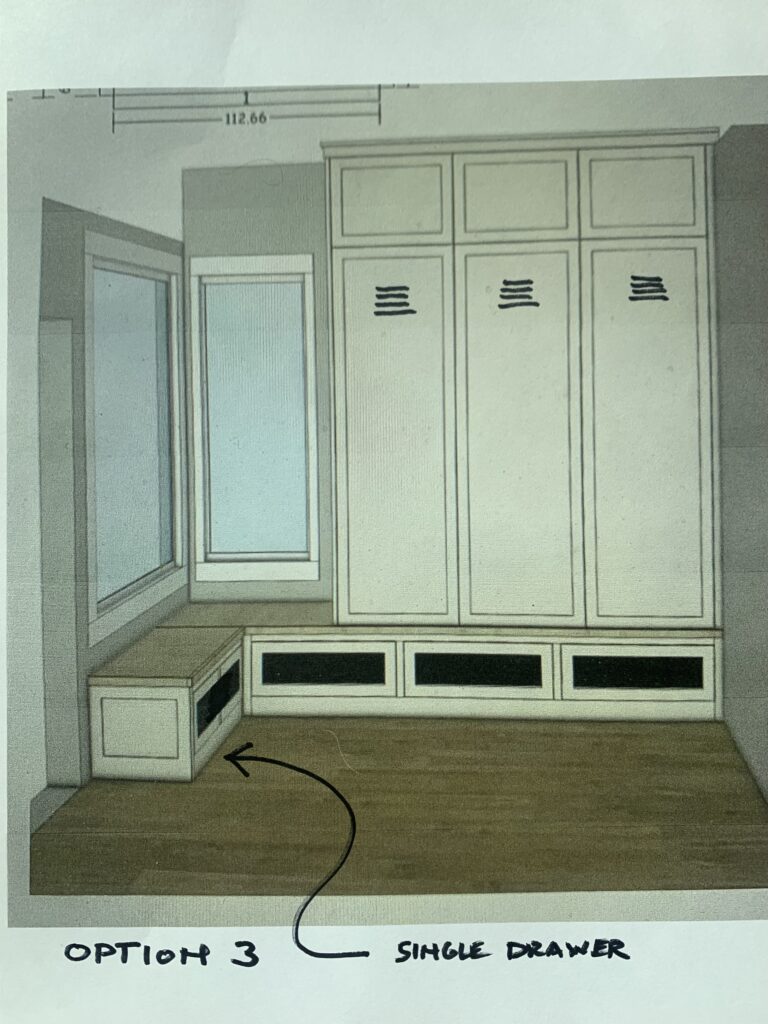
3) large mesh drawers
We ultimately went with Option 2, leaving open space under the bench for muddy/wet shoes and bigger boots that may not fit in the drawers.
Flooring, Hardware, and Lighting
FLOORING:
In our mudroom, we knew we wanted a darkish flooring that could hide dirt and dust well. We initially searched for this charcoal-colored hexagon-shaped tile:
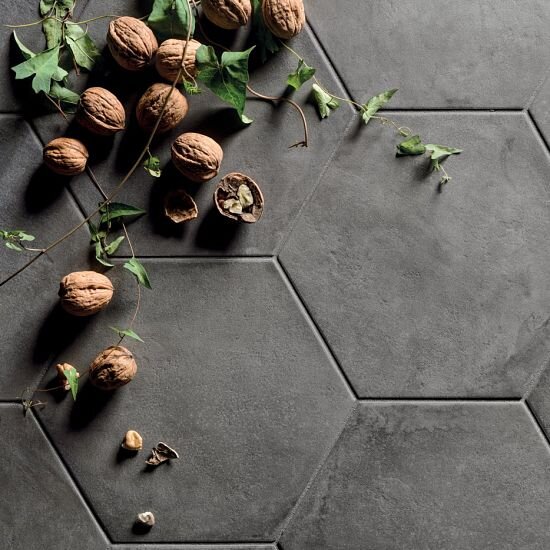
Source: Dakota Tiles
But when I saw the star and cross flooring in that inspiration photo with the green mudroom, I could not forget it!
Source: Yond Interiors
I had been trying to figure out where in the house I could put star and cross tile, whether in the kitchen as a backsplash or on the bathroom floors. After a lot of research and testing out samples made with different materials from different tile companies, we finally found the perfect tiles by Cle! They carried star and cross tiles that were the perfect shade of charcoal with the smooth matte finish we were looking for!
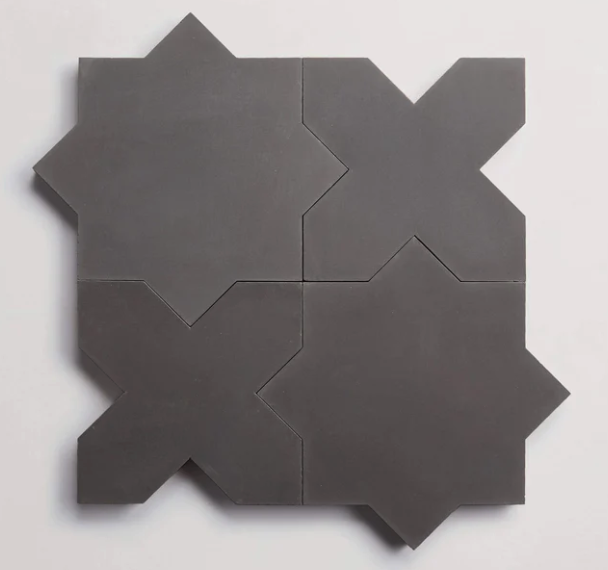
Source: Cle Tile
HARDWARE:
Once tiles were ordered, we needed to decide on the type of pulls for the cabinetry and drawers in the mudroom. We knew we wanted linear brass pulls for a modern look, and narrowed it down to two options.
Option 1: Brass Rejuvenation Bowman Pulls
Source: Rejuvenation
The Rejuvenation Bowman Pulls were beautiful, had a nice weight to them, and were just the right amount of brassiness. This is what the cabinetry and drawers would look like with those pulls installed:
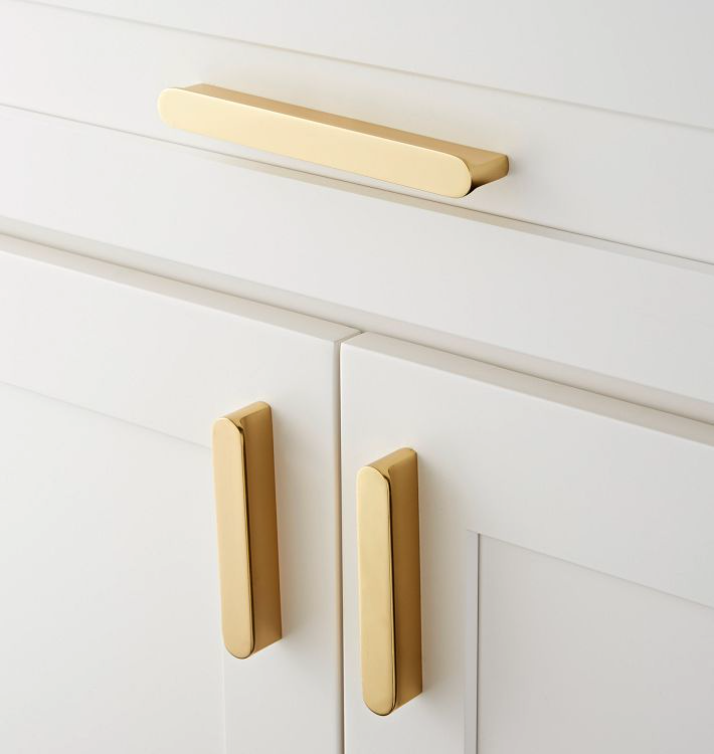
Option 2: Brass Satanga Edge Pulls

Source: Amazon
The Satanga Edge Pulls were more discreet and would be slightly hidden from view:
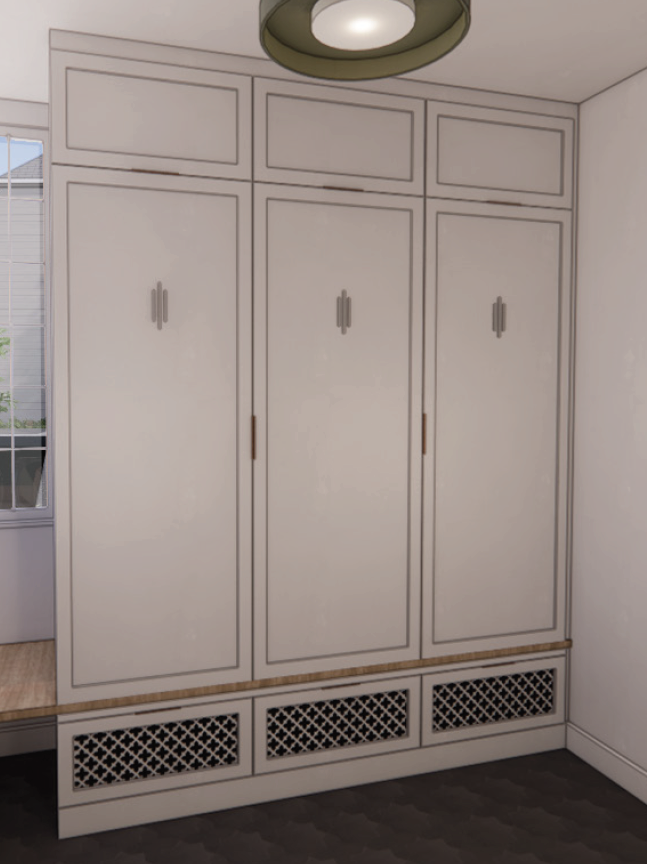
Both types of pulls were equally beautiful and functional, but because there were going to be 3 cabinet doors here, I didn’t want an uneven number of pulls to stand out. We ultimately decided on the Satanga Edge Pulls for a subtle and discreet look.
LIGHTING:
I feel like selecting lighting took forever. It was one of the last things we decided on, and I had so much decision fatigue after 2.5 years of planning. At this point, I really didn’t know what I wanted, but thankfully we finally had a designer to help us (we didn’t have one from the get-go), and she helped me with the entire process. She basically sent options where I would give feedback to the effect of: “I love it,” “I like it but don’t love it,” or “Nah.”
After much deliberation and rounds of options, we finally found a pendant I loved, the Rejuvenation Blaine Pendant:
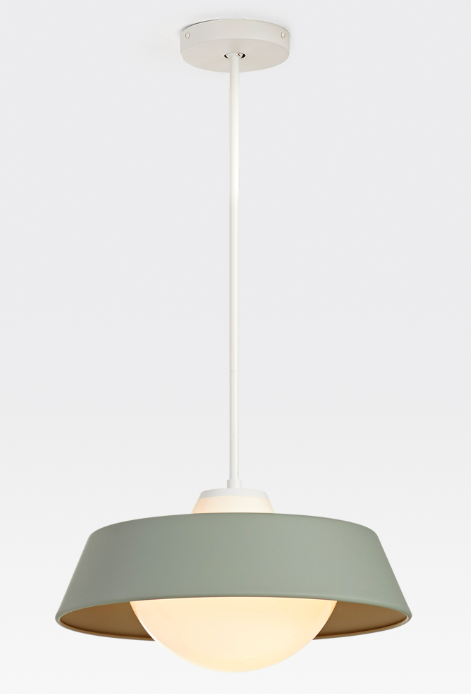
Source: Rejuvenation
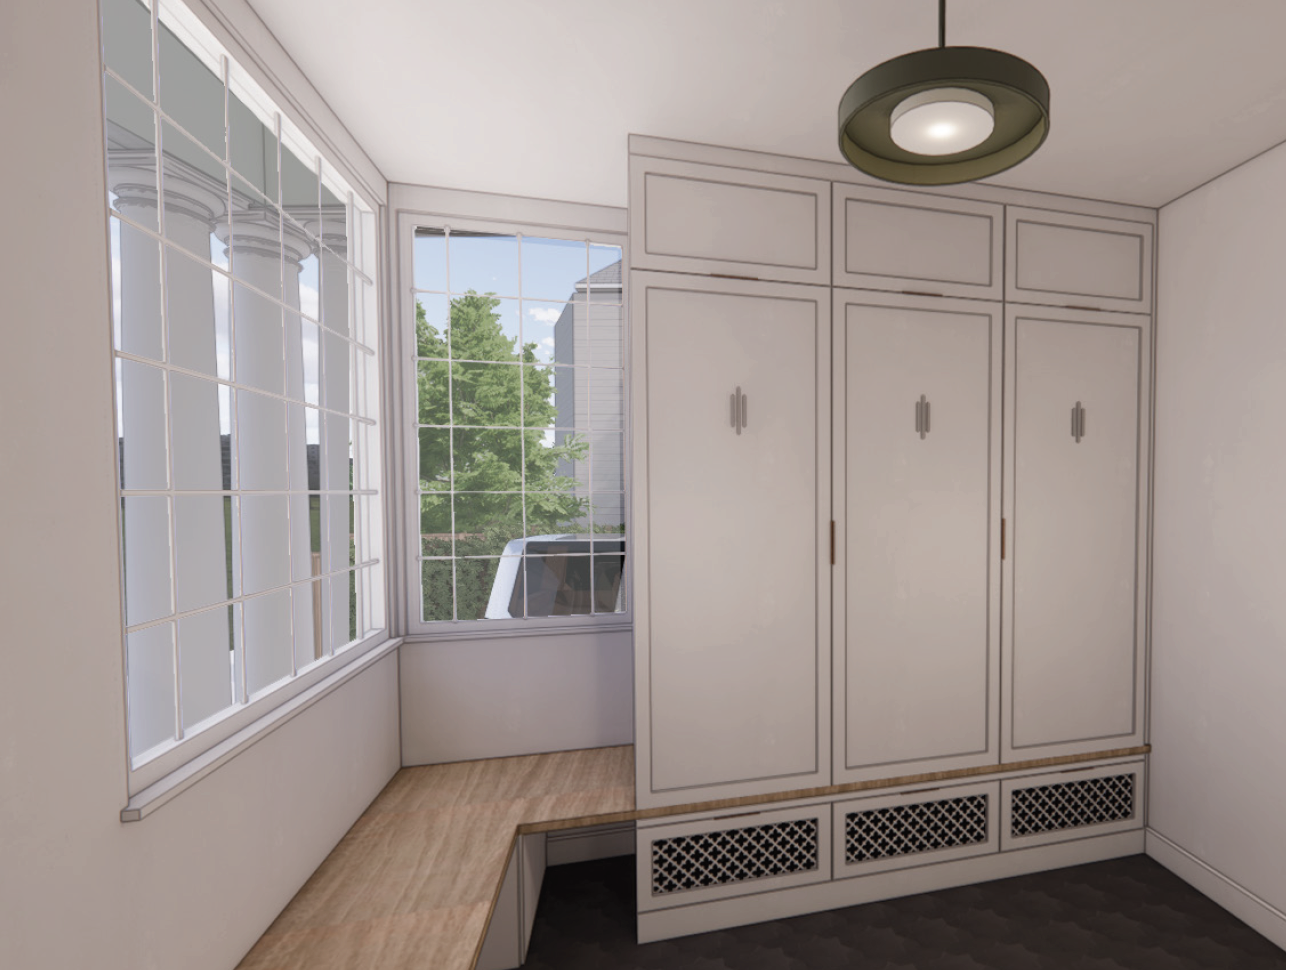
What a coincidence that it happened to be in my favorite Sherwin Williams Evergreen Fog color! IYKYK 😉 The final rendering of our mudroom with all the elements that we specified and wanted, looked like this:
Millwork
Once all the design decisions were finalized, the tile, baseboards, and door/window trim were installed first:

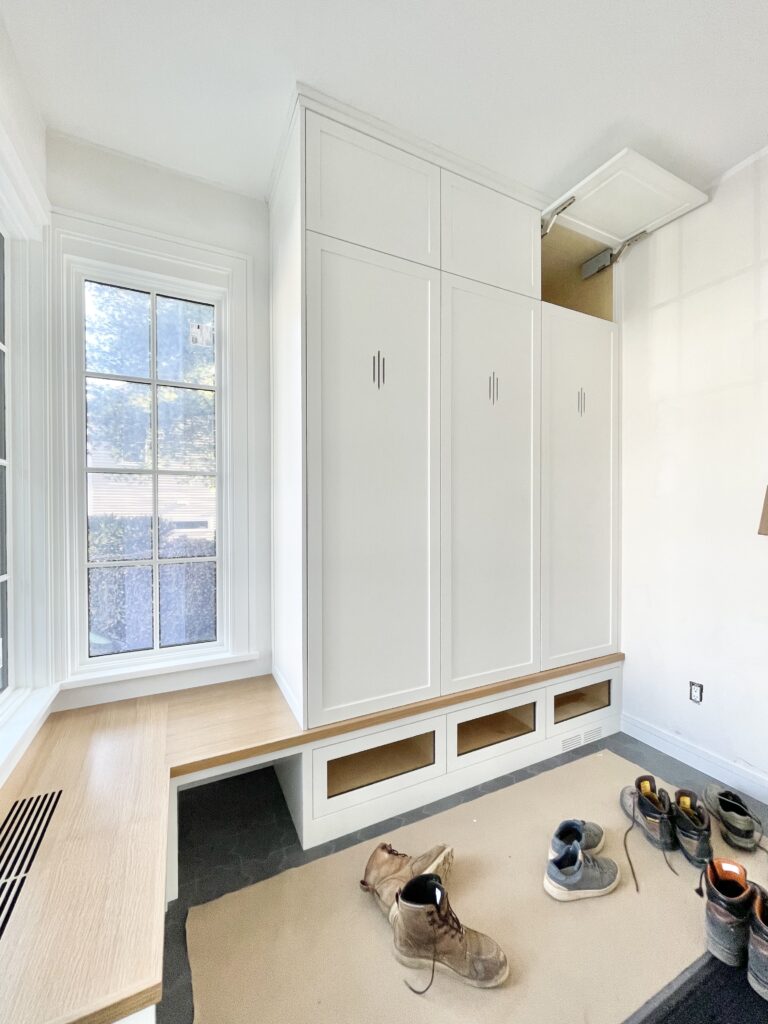
Then the millworker built and installed the bench, cabinetry, and drawers according to our plans:
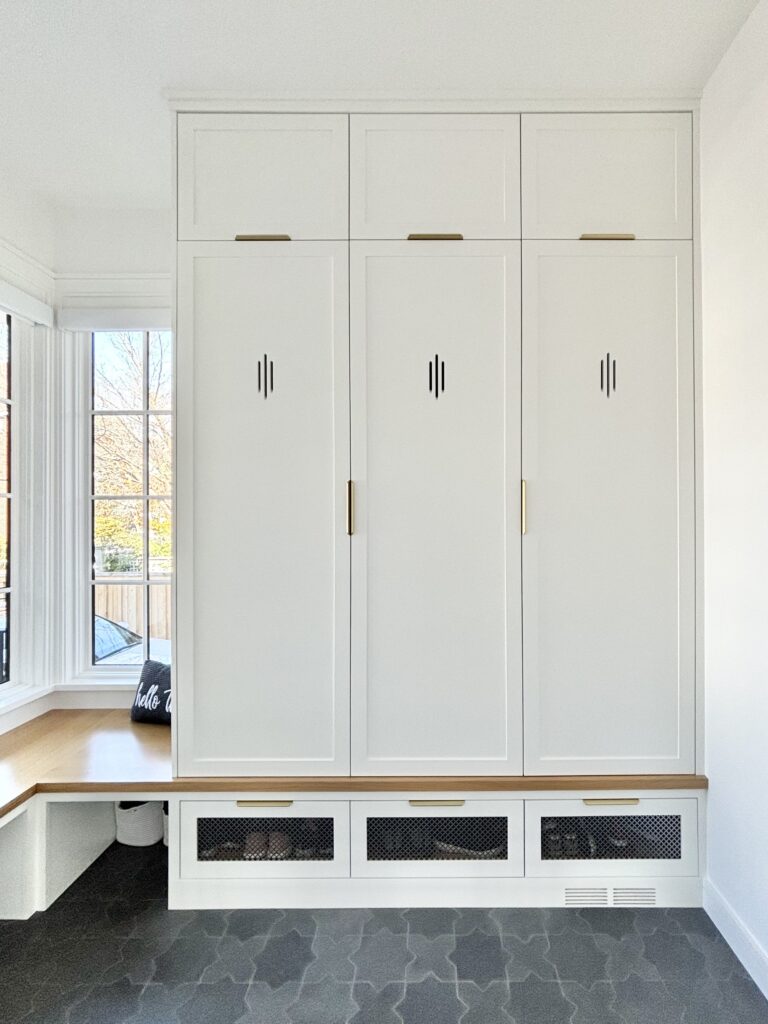
The drawer faces were then cut out for metal mesh to be installed:
And our Satanga Edge Pulls were installed as well:
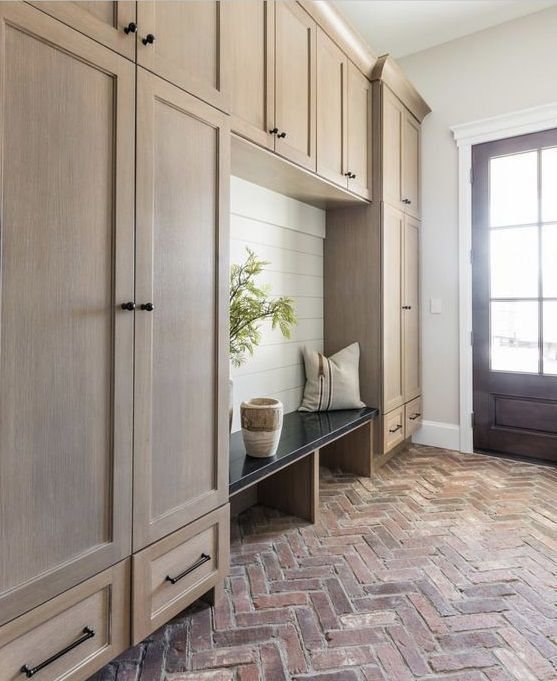
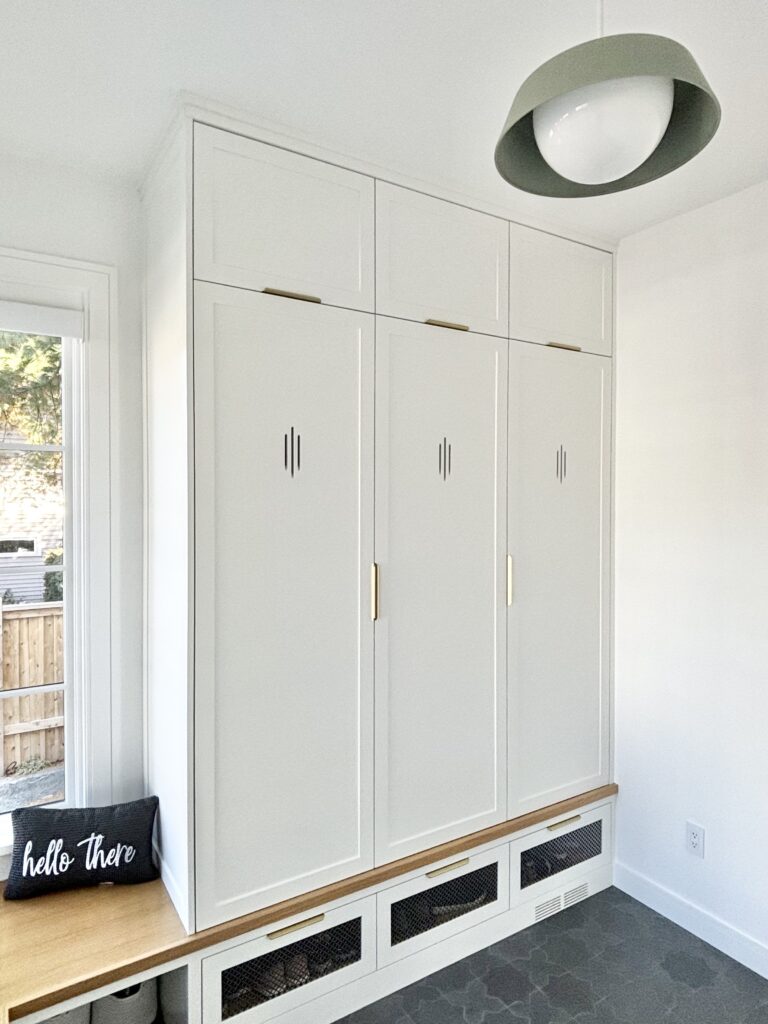
It took so long for us to make a decision on lighting that our Rejuvenation Blaine Pendant actually wasn’t installed until after we moved in, but it was so worth the wait:
In hindsight, and now that we’ve been living at our new house for three months, I am so glad I didn’t have to spend time building the mudroom cabinetry myself. We use this space so much every single day, with shoes in the drawers, coats in the closets, and out of season items at the very top. I’m so thankful we had the opportunity to convert the old porch into our cozy, functional, and beautiful mudroom to be used for many years to come!
Leave a Reply

Lifestyle
Pondering thoughts, personal life experiences, things I love, mental health, marriage life, and everything in between.
browse

Motherhood
Everything from my birth story to postpartum anxiety and depression, from c-section recovery to mom guilt and judgment. Prepare for raw and emotional posts!
browse

Books + Podcasts
Gleanings from books I've read and podcasts I've been impressed with, with the occasional children's book recommendations!
browse

DIY Projects
DIY project tutorials from six years of projects in my home! Very much a work in progress, migrating tutorials from my Instagram page to my blog!
browse
Join the hearteyes fam!
Be the first to know about new blogposts, insightful reads, favorite things & more
in just a couple emails per month. Let's set those expectations low HAHA!


Can you show the door that enters to your house? Stuck on ideas there! Thanks!