

This post is sponsored by Handy Products. All opinions are my own.
One of my favorite things about being a mom and former teacher is observing the creativity in the way children play.
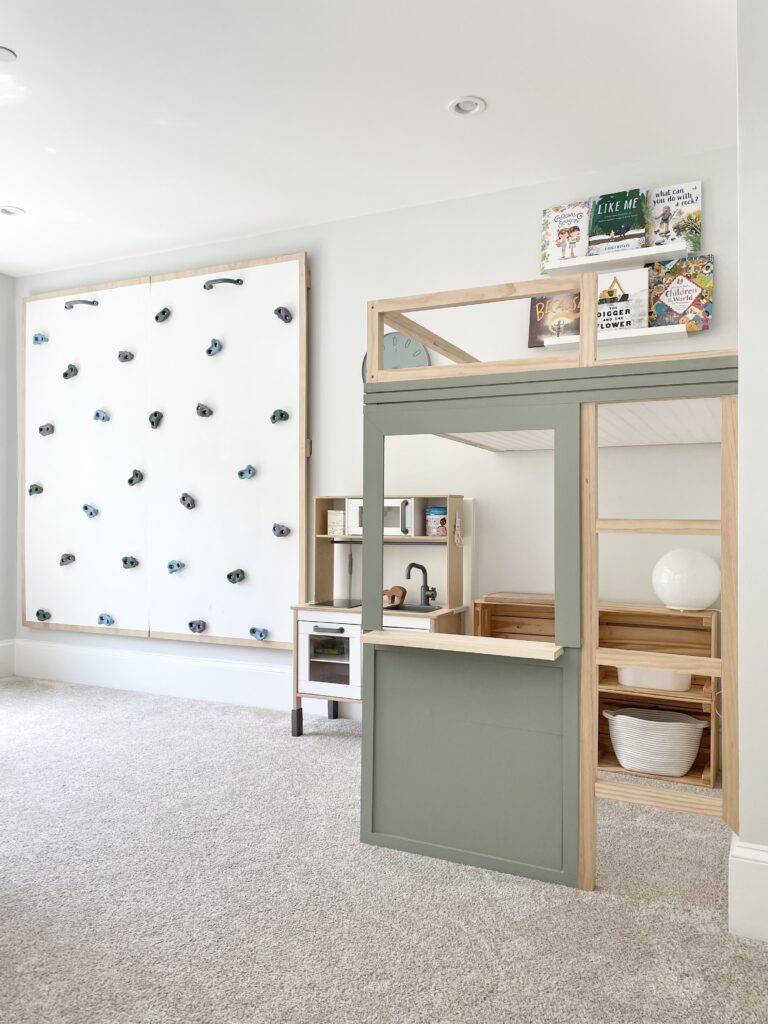
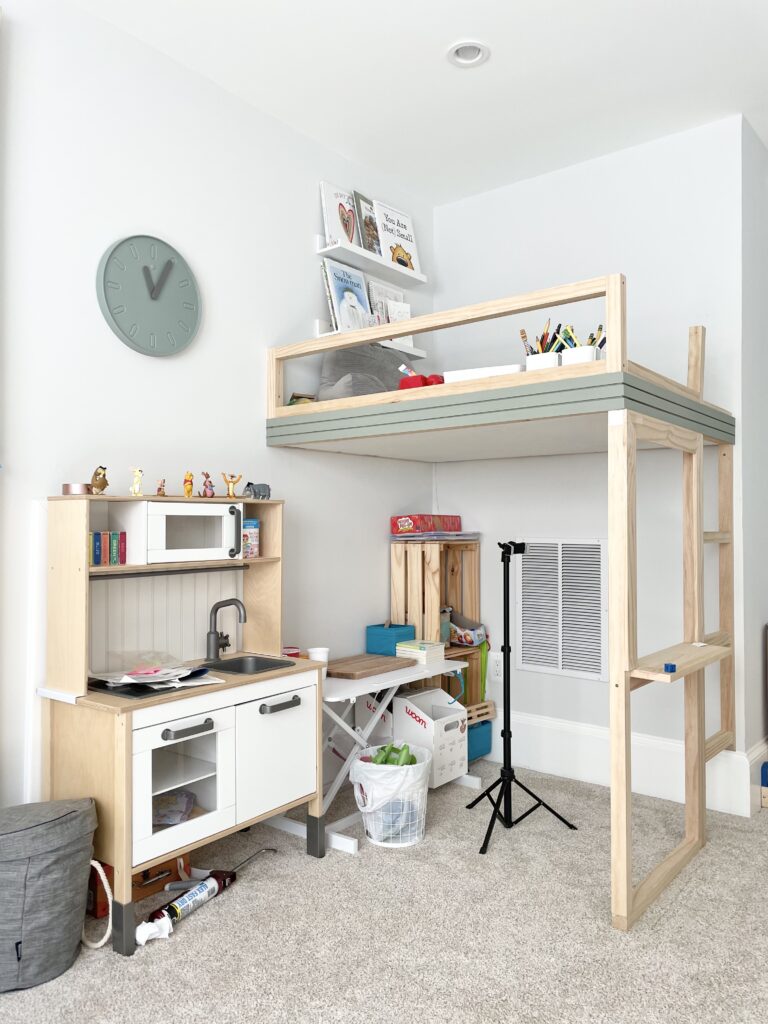
Our twins have loved using their Ikea play kitchen since they were a year old, and they’ve especially loved pretending to run a restaurant. Their restaurant is often complete with taking orders, cooking, serving, giving you the check, and swiping your credit card. Over the years, they became such serious little waiters and requested a storefront/pick-up window with a loft on top for reading and drawing. They eventually drew their ideas on paper and I got to work building their own kids’ space to make the most heartwarming and endearing childhood memories.
Here’s how I built our beloved DIY loft for our kids, with the help of Handy Products to bring it all to life!
Disclaimer: This post contains affiliate links. If you purchase something from a link I provided, I may receive a small commission at no extra cost to you. Thank you for supporting my creative endeavors!
Step 1: Build a frame and platform.
FRAME:
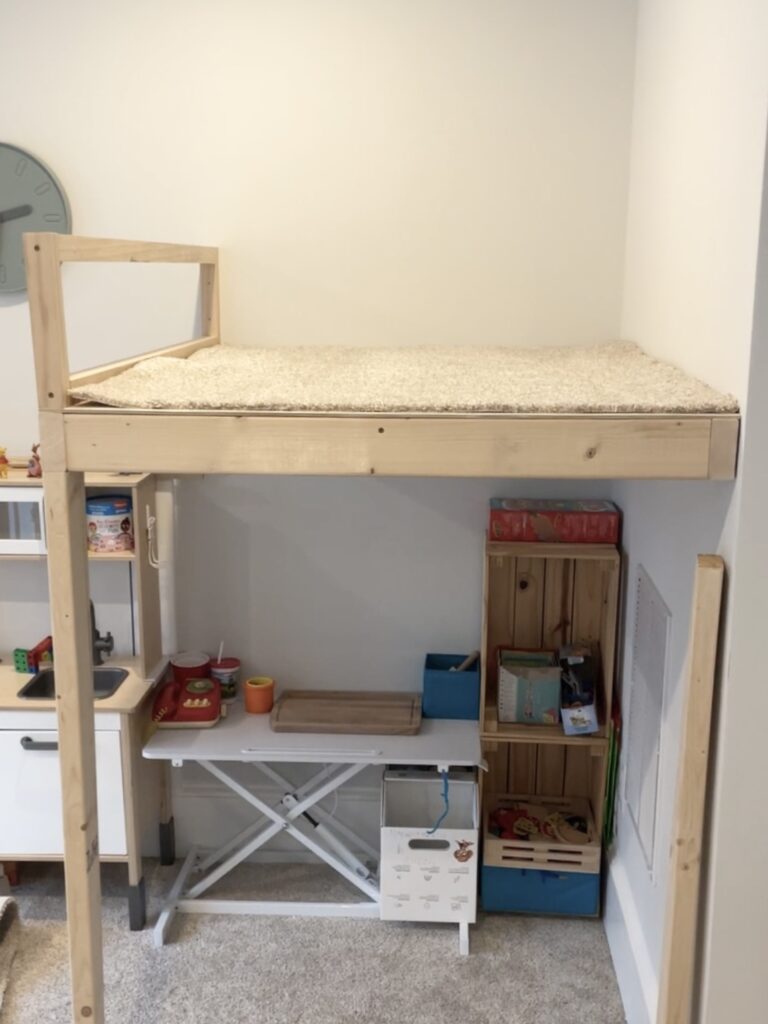
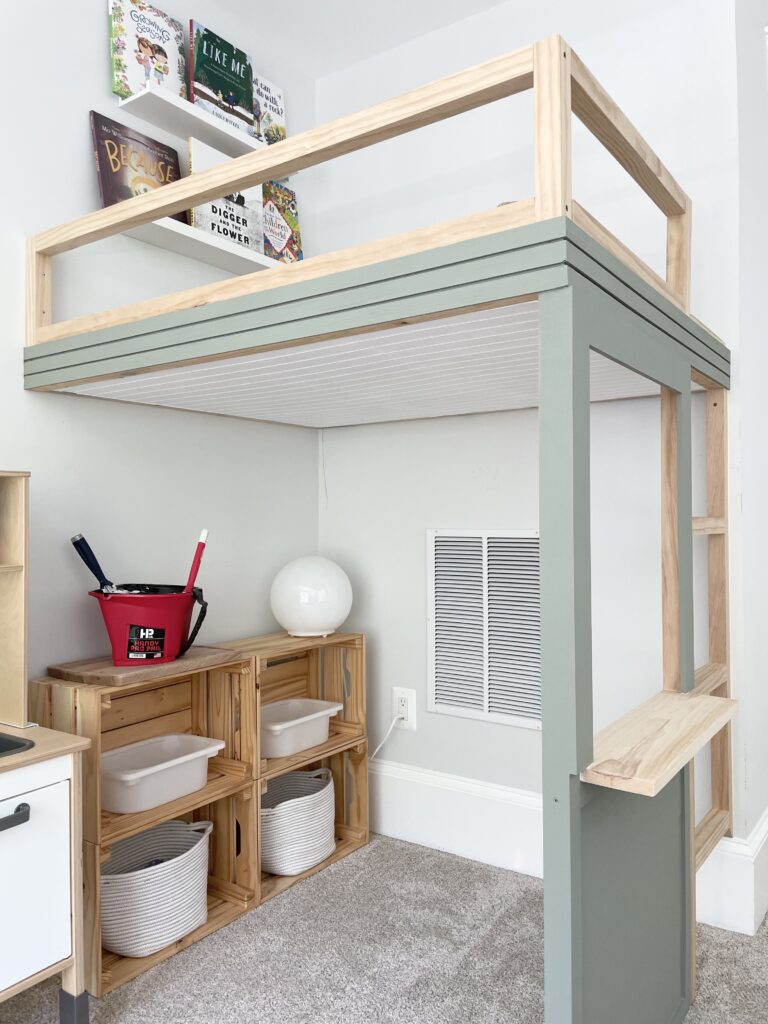
On the top floor of our house is an open carpeted space that we use as our play area. I wanted the loft to be big enough where the twins wouldn’t feel cramped, but not too big to overpower the light and bright space. I believe we settled on an approximately 4’x4′ space for the loft in this area here:
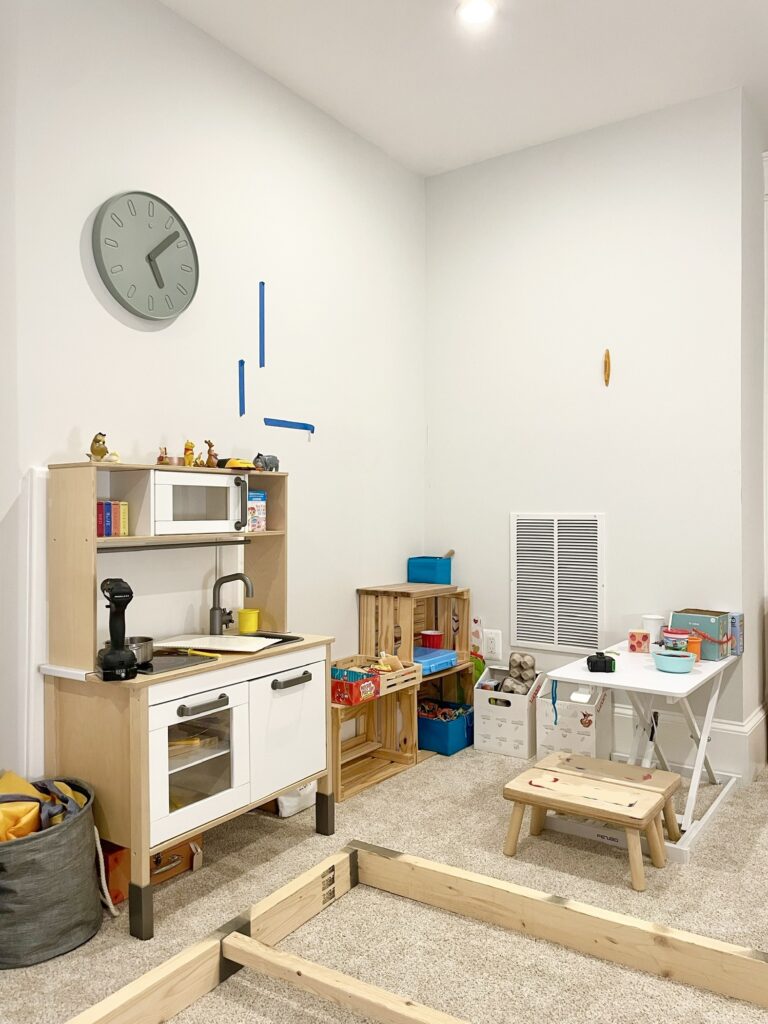
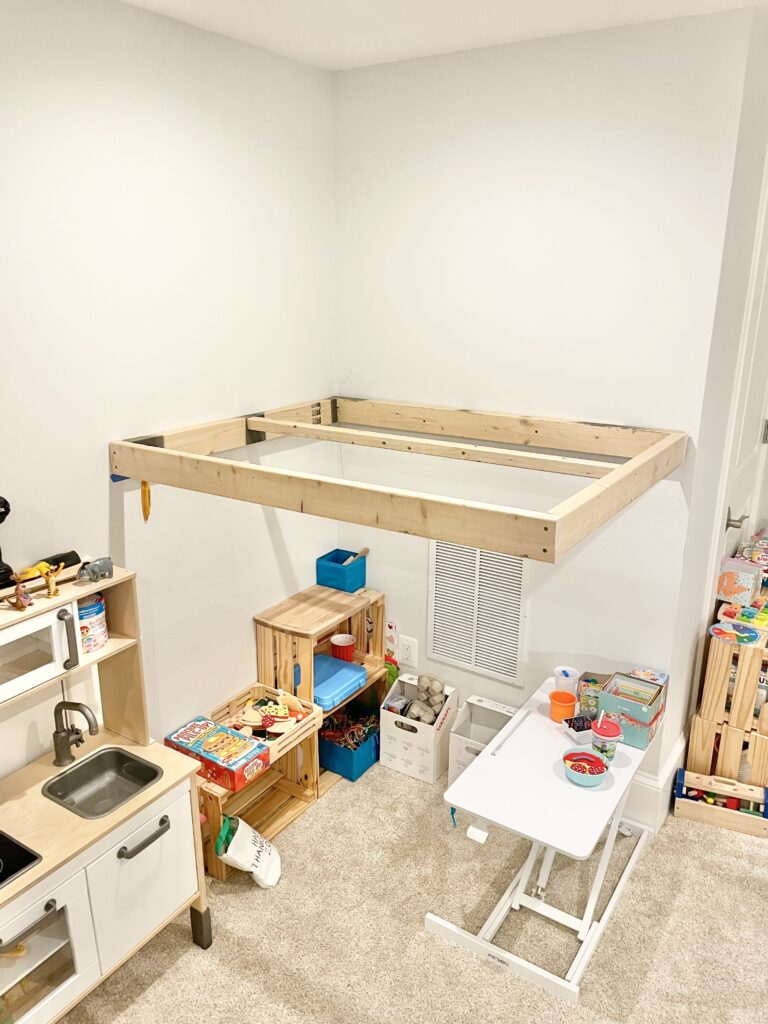
The way I determined at which height to secure the frame was a simple process. I had my son stand against the wall, guesstimated how much he would grow within a year, and added a few inches on top of that. Very scientific! 🤪 I used 2x4s and 3″ screws to build a sturdy 4’x4′ frame. Then I secured the frame into the studs in the wall, using my level to make sure the entire frame was level all around.
(Click here for a video on 3 ways to check for studs. You want to avoid hitting a water pipe like I did here. 🙈)
PLATFORM:
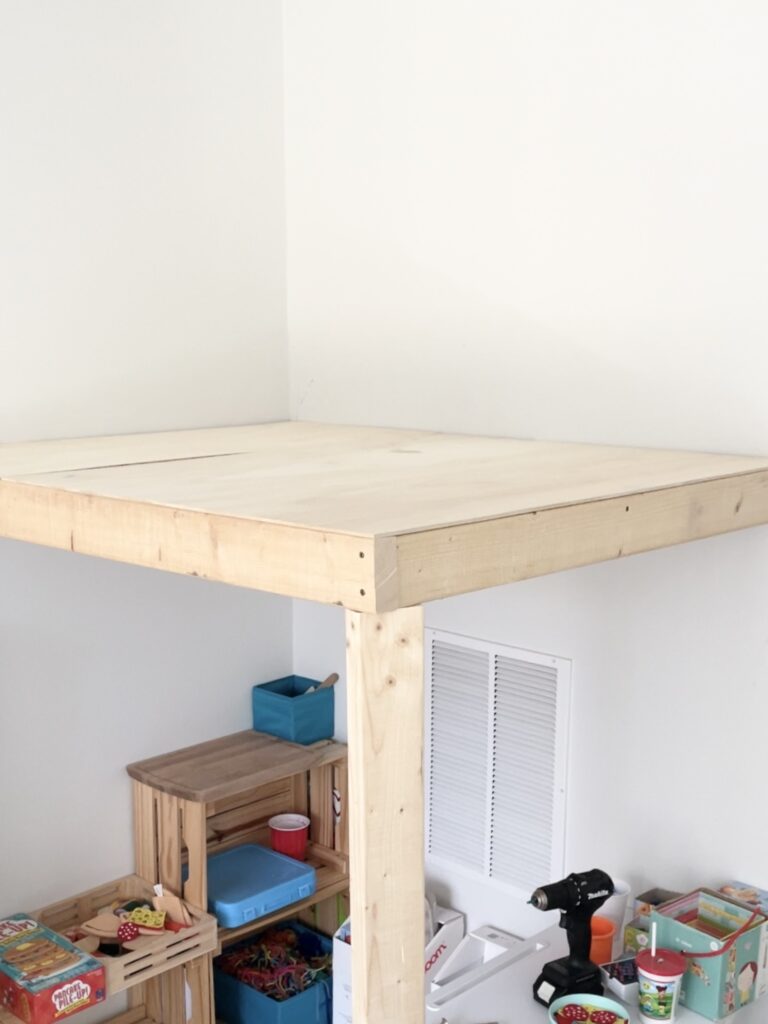
Once the frame was secured into the studs in the wall, I added more support beams to the middle of the frame. I used scrap wood (2x2s and 1/2″ plywood) since I had so much lying around, but if I were to build this again, I would use 2x4s instead to make it more sturdy when sitting on top. On top of the frame, I added 1/4″ plywood cut to size, and secured those pieces with 1-1/4″ brad nails.
To see a video tutorial, click here.
Step 2: Build a railing and cozy up the space.
RAILING:
I built the side railing with 2x2s and 3″ screws to the exact length of one side of the loft. Then the railing was screwed directly into the 2×4 frame and platform. I also screwed the railing into the wall, but since there were no studs there, my favorite drywall anchors came to the rescue.
Pro Tip:
Even though I used star drive no pre-drill screws, I still pre-drilled with a small drill bit to prevent any lumber from splitting.

COZY IT UP:
Whoever carpeted our top floor when the house was built, kept the leftover carpet in one of our closets upstairs! Imagine my delight when I realized the top of the loft could match the entire carpeted area! I used a utility knife to cut the carpet to size and placed it on top of the loft. If you don’t have an extra roll of carpet laying around, you could always use a rug or a few bathmats to create the same type of coziness!
To see a video tutorial, click here.
Step 3: Build a ladder, storefront, and add floating shelves.
LADDER:
The ladder to the loft was built in a similar way as the railing. I used 2x2s and basically eyeballed the width while screwing everything together with the same 3″ screws. (Again, always pre-drilling with a drill bit first to prevent splitting.) To secure the ladder, I screwed one side into the stud in the wall as well as the platform above.
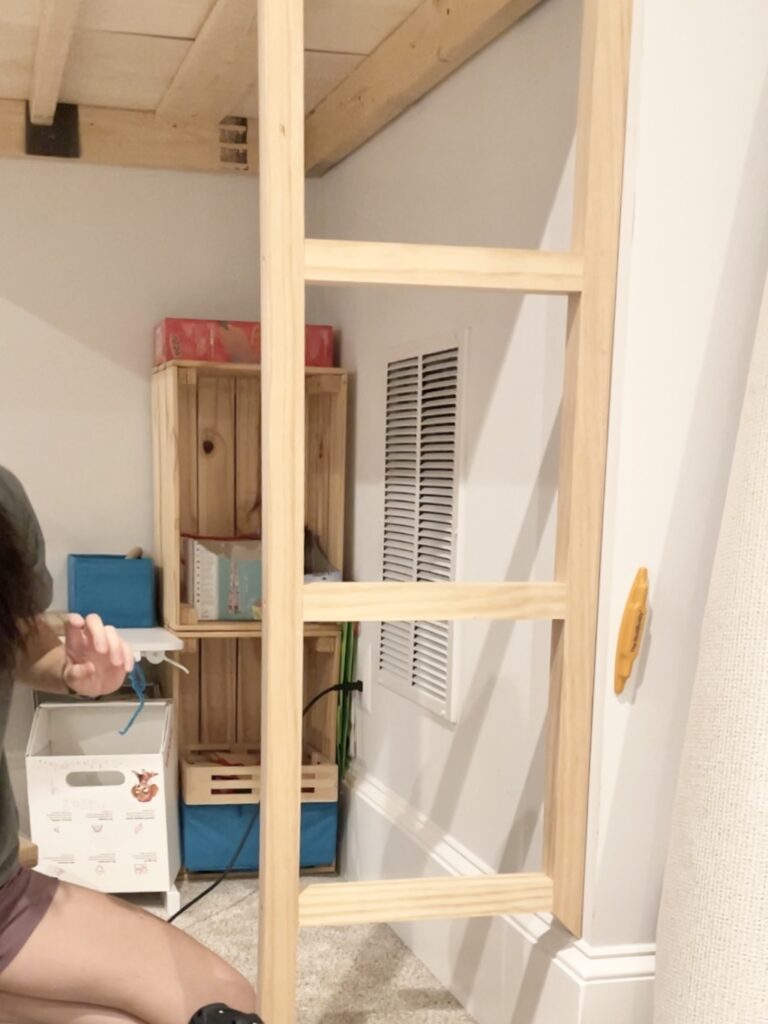
Our ladder ended up being about 12″ wide, but in hindsight, 16-18″ would have been more comfortable and easier to climb up and down. However, I didn’t build the ladder wider because I didn’t want to compromise the width of the storefront window, which was going to be directly to the left of the ladder.
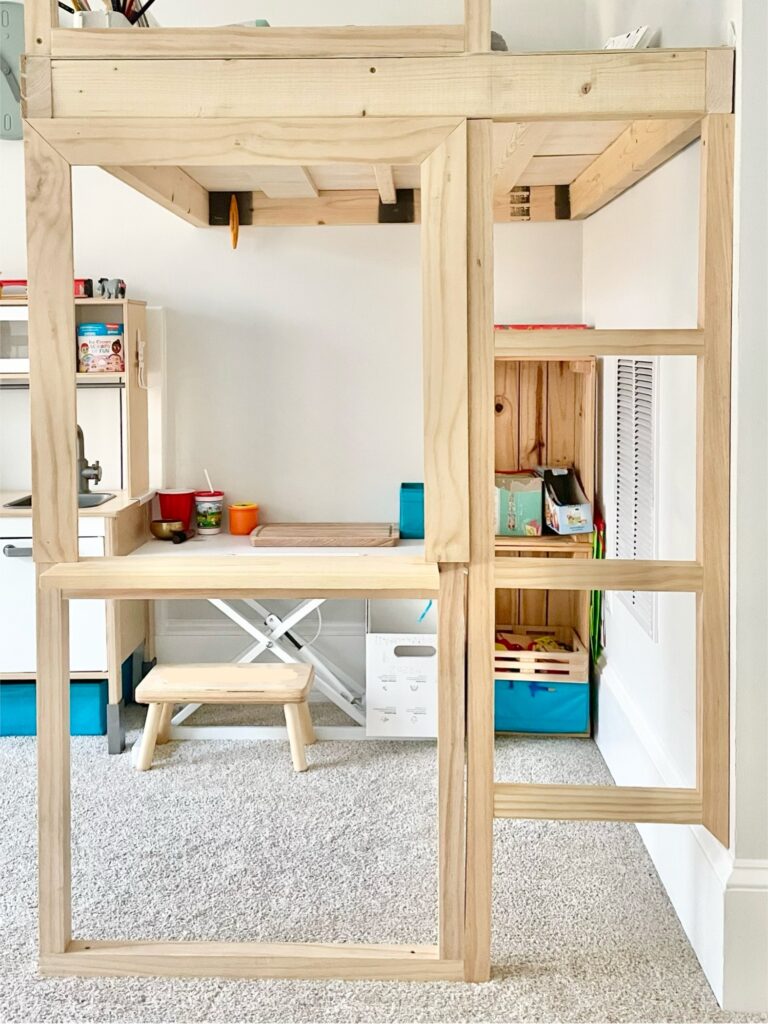
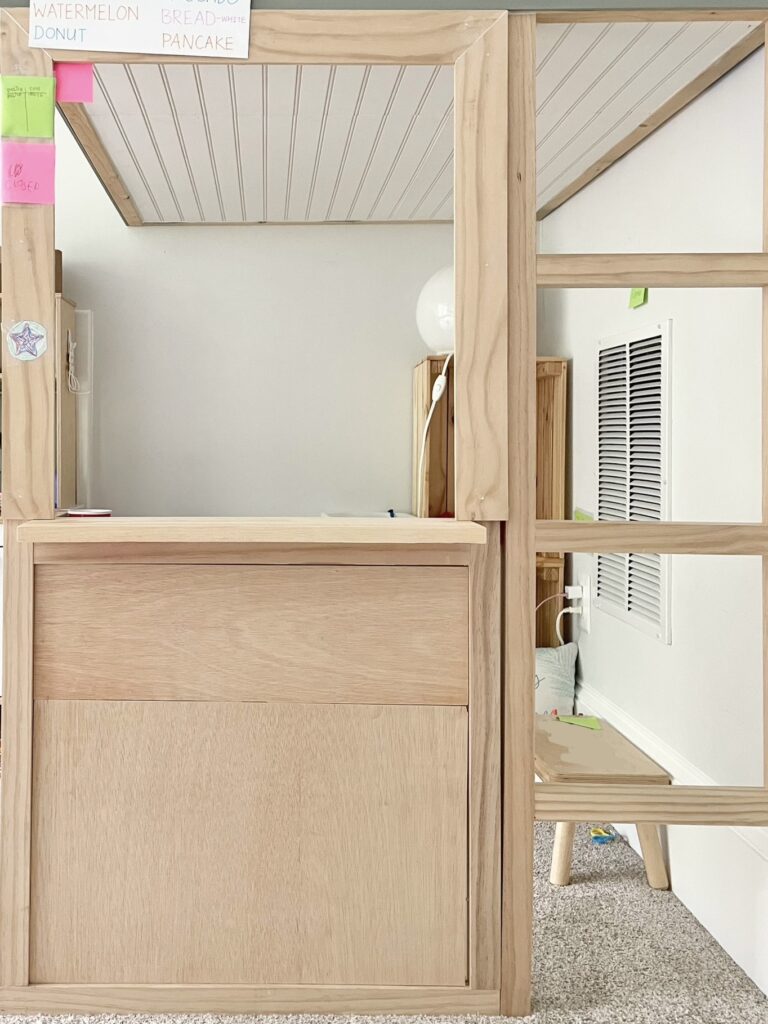
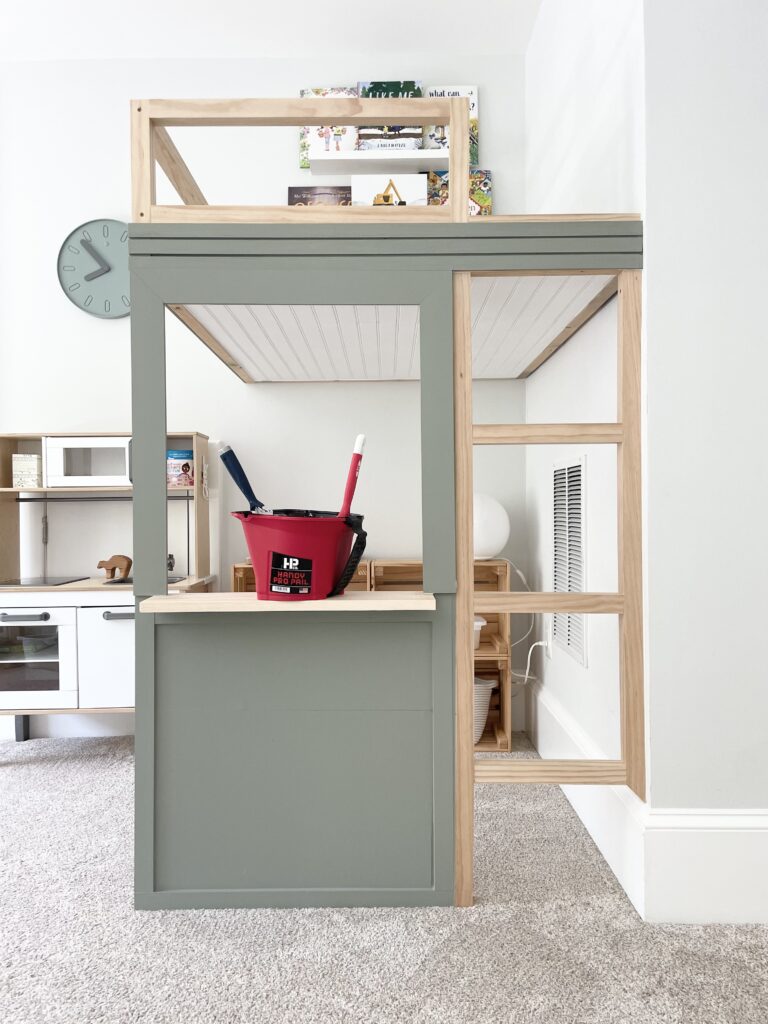
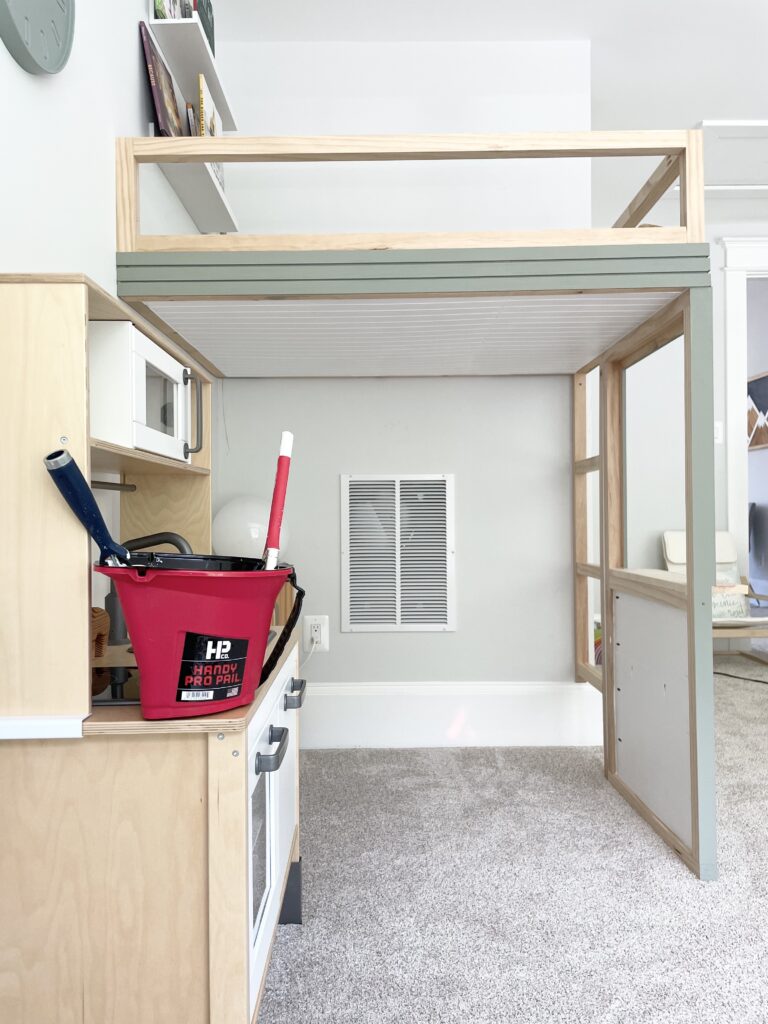
STOREFRONT:
The storefront was also built with 2x2s and 3″ screws. I built a frame and screwed it into the platform above and the subfloor below. Then I used scrap pieces of wood to trim out the window and secured those pieces with brad nails. I also added a countertop ledge by screwing a scrap 1×6 into part of the 2×2 frame.
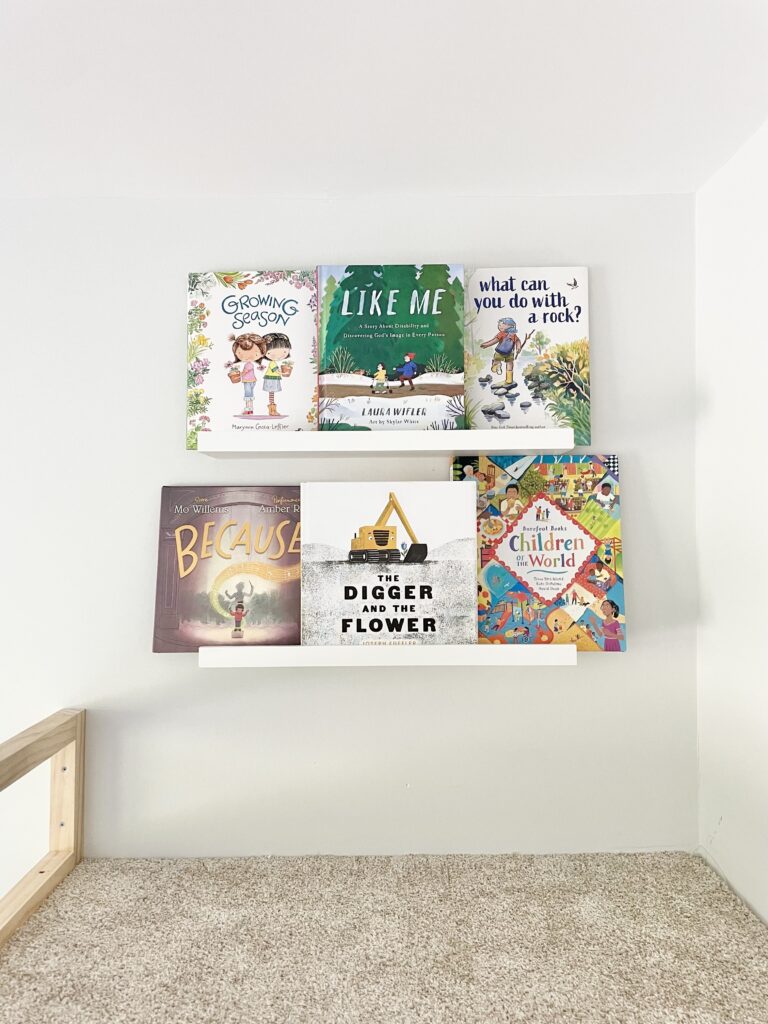
FLOATING SHELVES:
As this project was progressing, I remembered that I had bought some Ikea picture ledges years prior that were still in its packaging! This was the perfect place to install them so I used the same drywall anchors as before and screwed the picture ledges into the wall on top of the loft.
To see a video tutorial, click here.
Step 4: Add trim work, bead board, and more!
TRIM WORK + BEAD BOARD:
At this point, the bulk of the project was complete and everything just needed to be beautified. 😉 To cover up the bare 2×4 frame, I added 3 rows of lattice trim for a slatted detail. Then I got really excited and wanted to paint the slats with my favorite shade of green, so I used my sanding sponge to make sure everything was smooth and started painting. Then I added bead board underneath the loft so the exposed support beams would be covered. Everything was secured with brad nails and my trusty brad nailer!
CLOSE UP SPACE BENEATH COUNTERTOP:
Underneath the countertop was still a big open hole, so I used a few scrap pieces of 3/4″ plywood and pocket holes to close it up and secure it to the storefront. Now the end was really in sight!
To see a video tutorial, click here.
Step 5: Caulk and Paint!
CAULK:
Painting is one of my favorite parts of a project because of the instant gratification. However, to make a paint job look seamless, a lot of preparation needs to occur, such as filling nail holes with wood filler and caulking all the edges and corners. I spent a good amount of time caulking and filling holes, knowing that it would all be worth it in the end.
Below is an example of the difference between a corner that is caulked vs. not caulked:

PAINT:
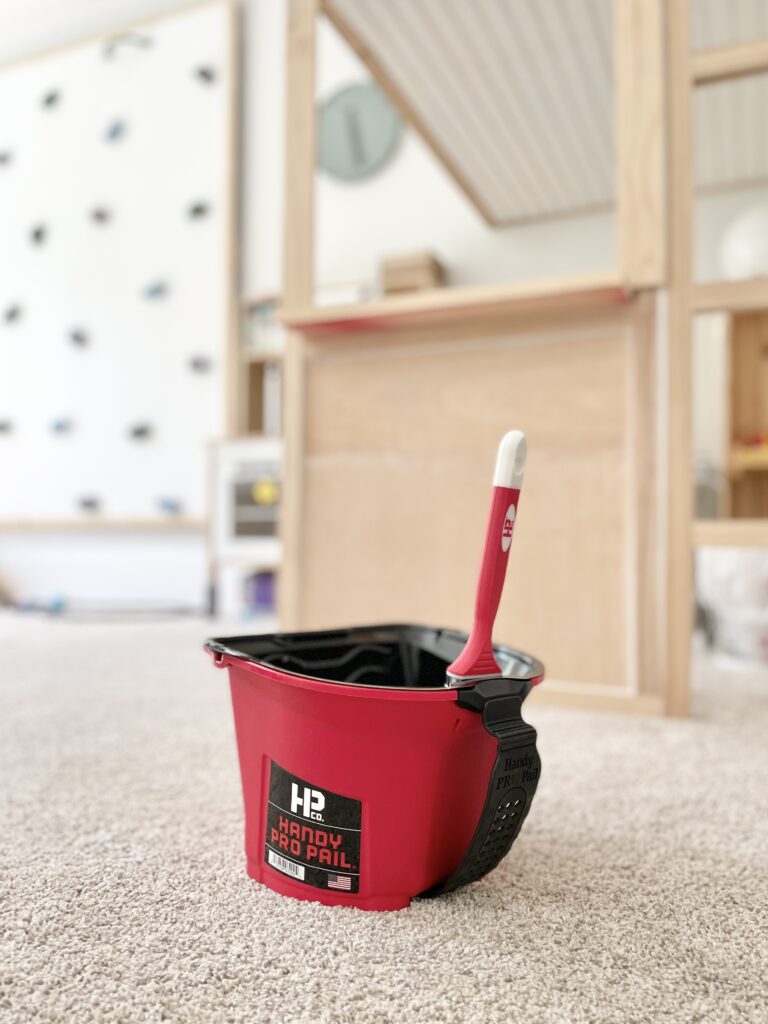
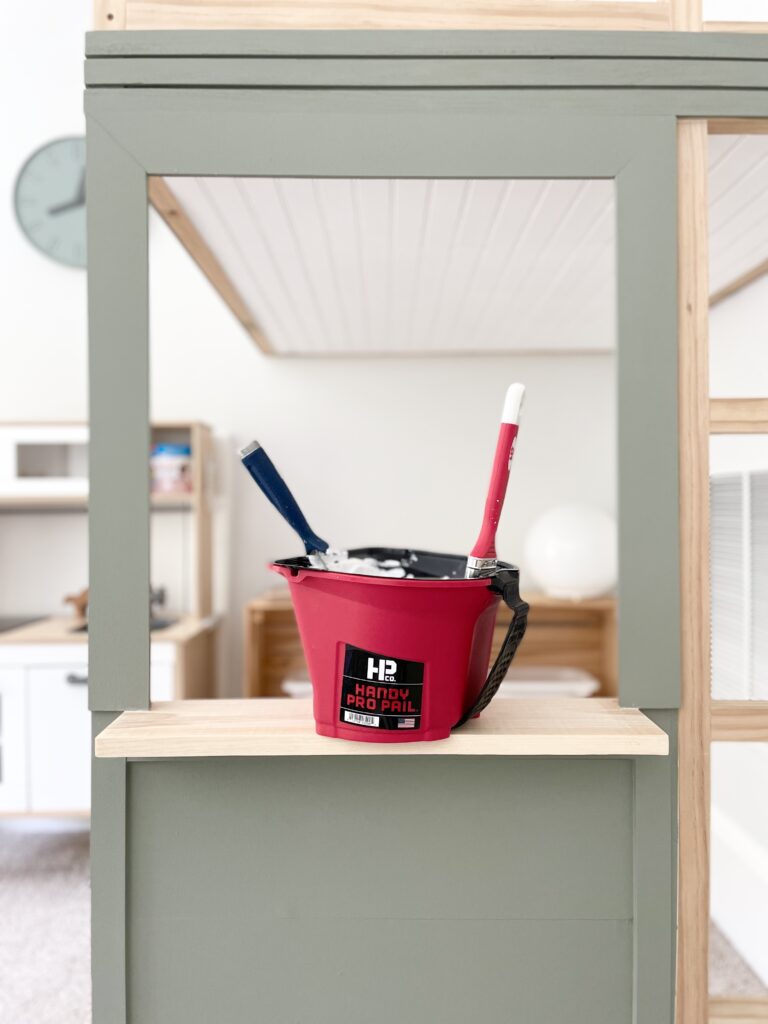
I was gifted the Handy Pro Pail (below) for this project and while I’ve used the Handy Paint Tray for many years, I loved the portability of the Handy Pro Pail. With the Handy Pro Pail, I was able to easily pour my paint into the disposable liner and effortlessly switch between using both a paint brush and a small paint roller. There’s even a magnet to conveniently hold your paintbrush in place on the side of the pail! All these little details made the whole painting process so efficient, which I’m all about!
To see the video reveal, click here.
(Before painting)
(After painting)
Enjoy the creativity of child play
Out of all the DIY projects I’ve completed over the years, this one was probably the most rewarding build. To have my twins dream up a space, design it, share with me the ways they wanted to play, and for me to be able to bring all of it to life was such an amazing experience. They were so excited to have their very own loft that they even started taking over the space before I started painting!
Since then, they’ve used the top of the loft to read, draw, have musical performances, and store their treasures out of reach from anyone else. As for the storefront below, it has been used as a restaurant, toy store, coffee/tea shop, and even a police/fire station! The possibilities are endless with their creative little minds and I was so happy to be able to provide a space for their imagination and play to run wild.
previous Post
next Post

Lifestyle
Pondering thoughts, personal life experiences, things I love, mental health, marriage life, and everything in between.
browse

Motherhood
Everything from my birth story to postpartum anxiety and depression, from c-section recovery to mom guilt and judgment. Prepare for raw and emotional posts!
browse

Books + Podcasts
Gleanings from books I've read and podcasts I've been impressed with, with the occasional children's book recommendations!
browse

DIY Projects
DIY project tutorials from six years of projects in my home! Very much a work in progress, migrating tutorials from my Instagram page to my blog!
browse
Join the hearteyes fam!
Be the first to know about new blogposts, insightful reads, favorite things & more
in just a couple emails per month. Let's set those expectations low HAHA!


+ Show / Hide Comments
Share to: